Saturday, August 30, 2014

Saturday Scrapbook Sharing

Well, it's not early in the week, but I am here to share more scrapbook fun from my Golden Summer Afternoon kit.  I still have a bunch of scraps left, though, so no kit killing photos just yet. This first photo is one of the only heritage style layouts I have made, because I just recently came across a stack of photos from my grandparents house, and would love to start incorporating them into my albums. The vintage style of the Maggie Holmes Flea Market line is perfect for these type of photos! Lots of scraps were used in the making of this layout. I love how rich and pretty you can make a page just using lots of layers of scrap papers and a couple of embellishments!
For this next layout, I combined bits from my Golden Summer Afternoon kit, my June Stash kit, and my Summer Solstice kit from this month. I misted the wood veneer with primrose Color Shine, and painted a bit of the Color Shine on the hearts, and the center of the bows on the shoes, and dropped a bit in the center of the camera chipboard. I added little butterflies and pinked circles punches from scraps, and cut scraps of paper into fishtail banner shapes for layering.
I had some scraps that were perfectly sized for a card front, so I whipped up a birthday card-the chipboard stickers from the Flea Market line make it special and give dimension.

So what have you been up to this week? Be sure to drop back by on the first, I have a fun new kit from my stash to share!

Saturday, August 23, 2014

Scrapbook Sharing On Saturday

I know I have been somewhat MIA from the online world this past week-it has been a week of getting settled into back-to school routines, end of summer colds, and football. Lots of football! Evan is still playing for the middle school team, but he wants to go to all of the games, including the high school games. Which makes my life a little more hectic, but I have to say I understand and even expected it! Anyway, it's the weekend, and my poor sick hubby is trying to sleep off his cold right now, so I will share a little of what I have been working on. I have a bit of a back log of kits that I have made up for the Counterfeit Kit Challenge, and I just grab one whenever I am feeling inspired to create.The kit I grabbed this past week was my Golden Summer Afternoon kit from July:

This kit was one of my favorites that I have ever made! Seriously loved the creams, pinks, and gold, with the textures of the canvas and kraft hearts, the gold chunky glitter Thickers, yummy Color Shine... anyway, I killed a pretty good portion of this kit last week, so I am happy to share what I made with it!

Probably my favorite page from this kit;  "34th Birthday Pancakes":
so many reasons I love this page, but it started with the product! I love the Maggie Holmes Flea Market collection, and the sheet of vintage plates was probably one of my absolute favorite things about the line, but I had no idea how I was going to use it. Then I saw that someone had cut them out and sprinkled them across the page, and had an AHA! moment...it was the perfect solution...and I could re-arrange the plates on my page in clusters with other bits and pieces, so that my favorite pieces were showing. I added in chipboard, enamel dots, drips and drops of Color Shine mist,  and then added the photo and story about how special my Mommy made me feel (yes, I still call her Mommy) when she made me a special breakfast and brought it to me for my birthday. A simple little story, but one I don't want to forget.

"Me&You": 
More fun products to capture one of life's best moments with my love- Background paper by Basic Grey, from their Mellow collection a few years ago, and from Sassafrass Lass's Sunshine Broadcast (I think) line, mixed with bits of chipboard from Maggie Holmes, an enamel geotag and enamel dots, kraft labels from Target's dollar spot, a few bits from my scrap bin (the journaling card that I put under the chipboard frame, and the pink hydrangea in the cluster) I also slipped in a leftover plate from the vintage dishes patterned paper.

This layout was inspired by the lovely Jill Sprott. The background was not in my kit, but I saw her lovely layout, and was instantly inspired to sit down and scrap, and this is the result, something a good bit different from what I normally do, because I am usually a bit too lazy to pull out the paint for my pages, then too impatient to wait for it to dry before I continue creating. But I did it this time, and I am quite happy with the result! Thanks for the idea, Jill! I put down all sorts of journaling cards from my stash, then painted over them all with a watered down white acrylic paint. Then, I actually went about my housework, etc, and waited for it to dry! It was actually pretty painless ;-) . Once it had dried, I built the layout on top with lots of bits from the kit for embellishment, drips and spritzes of mist, added the photos and story of my daughter creating a birthday card for my son (basically she just wanted an excuse to try out all of my mists), and did some final embellishing.
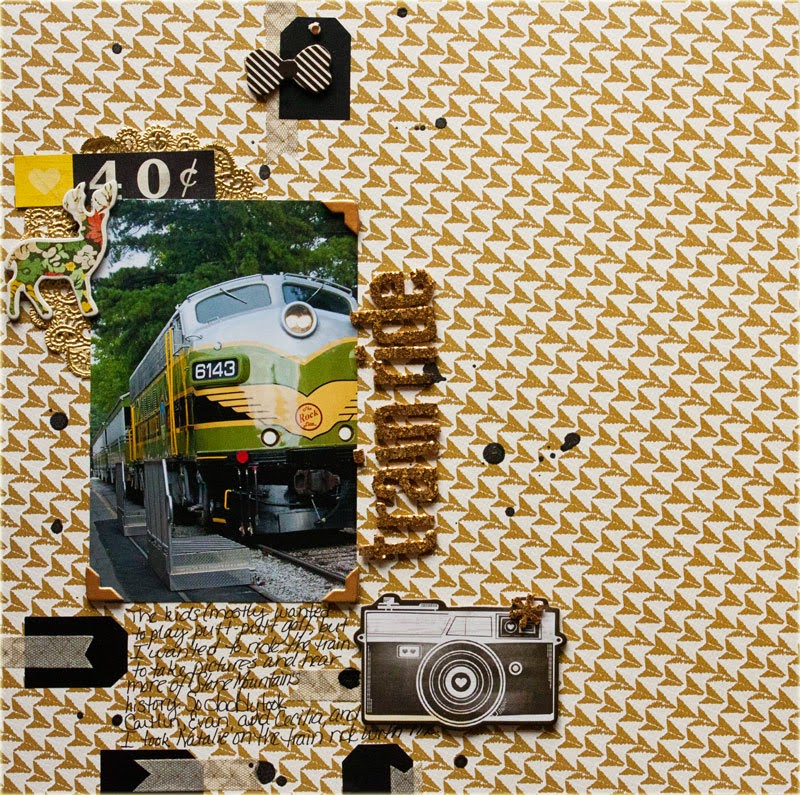
 This layout was modeled after this sketch from My Mind's Eye:
I like it, but I think maybe my journaling is a bit hard to read...anyway, love the colors and richness of the Carta Bella paper (their patterned paper is just so wonderfully thick and textured!), and I feel that the blacks and golds go quite well with the photo. The funny part? I forgot to use My Mind's Eye on this page, even though almost all of my other pages do have at least some enamel dots!Oh well, I was too late to link up anyway, I just thought it was funny!
 This is a page for my Disney album, although the "Travel Essentials" part really does hold true for most car trips for me: Since it's going in my Disney album, I added a Hidden Mickey (so much fun to do, and glad I saw the idea on Susan's blog -she makes some of the best Disney pages and sketches I have seen, too). Most supplies for this page are from the kit, although I did pull out the blue glitter Thickers from my stash, since I knew they came from the MH Flea Market collection, and I felt that they would work a little better with the layout than the gold ones. I even got to use some of the fun Studio Calico printables, as they suited the travel theme of the page perfectly:
This page was inspired by the October Afternoon sketch shared as the CKC Challenge #2:
Basically just a note to my younger self, used a pretty paper from Tim and Beck (Sassafrass Lass) for Studio Calico, and bits leftover from the other papers, with washi tape, and a cluster of flowers and  feathers:
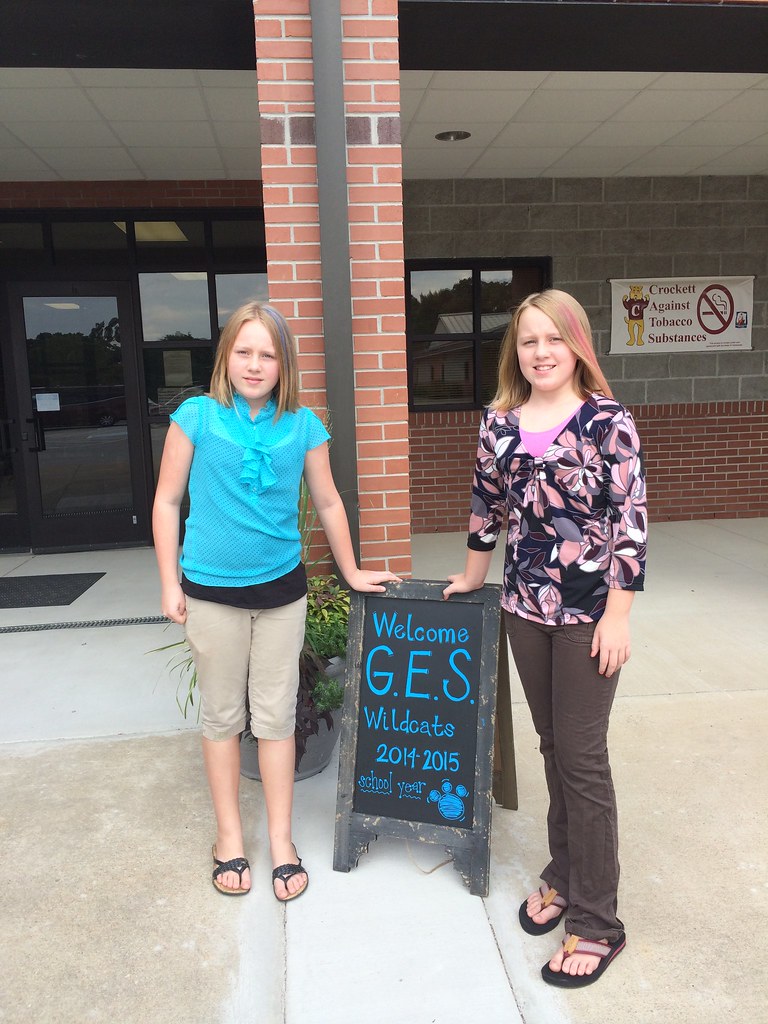
And I love this one of my little girl (the one who cooperates with me when I stop because I saw some lovely light on the way to school):

So, what have you been up to this week? I'd love to see! I'll work on a few more little projects, and share what's left of this kit early next week (not much-yay!It feels so great to "Kill a Kit!").

Thursday, August 14, 2014

Throwback Thursday...An End to Elementary School


It seems just yesterday that these girls were starting Pre-school, and so excited that they slept in their clothes the night before (shoes and all!) their first day.
Natalie:

Cecilia:

(Just look at the tiny Dora beds-they loved Dora the Explorer!)
 I had a lump in my throat as they waved goodbye to me then, but I must admit I was a bit excited that I would have a bit of time to myself, and to actually be able to keep the house clean for a few hours. The lump in my throat and tears in my eyes are swelling now, as I realize that this will be a year of lasts for me, as my babies are growing into young ladies, and this will be their last year of elementary school.

Untitled

I have seen such a change in them, even since last year. Last year was all about comfort in clothing-t-shirts, jeans, and jackets. This year, they are starting to develop a bit of a style, wanting to match their shoes to their shirts or clothing, hair chalk for fun, colorful streaks... and Cecilia (on the left) told me yesterday that she wants to grow her hair out long. I love the young ladies they are becoming, smart, and beautiful, but I do miss those babies, too! Ah well. Time marches on. Time to embrace the change and try to shrug off the nostalgia, as my mommy heart breaks just a little.

Wednesday, August 13, 2014

Workspace Wednesday: Paper Storage

Pretty papers are such a big part of my scrapbooking. Give me paper and I can make just about anything. Flowers, embellishments, journaling cards, you name it! Which means that I may have a wee bit of a paper addiction. If I see a pretty paper, it is hard to walk away! So inexpensive and useful, I think. Well, I don't know how I jammed all of my supplies into one little closet, but a whole room is so much better! I finally have a place for all of my pretty papers, and my storage system makes it so much easier to find that paper that I know I have "somewhere". It took a few days and evenings to label and sort, but this is my system, and right now it is really working for me.

I store most of my papers in these fantastic storage units from Wal Mart's Better Homes And Gardens brand , for less than 70 bucks each:

The fabric cubes in the bottom of the storage units are also from WalMart, about 6 bucks each, and they have quite a few color choices. So roomy,and they fit the storage units perfectly. I don't have an Ikea anywhere close to me, and these units fit my 12x12 papers and albums very well, so this is a great solution for me.
I have loads of paper pads, because that is what is most readily available to me, from Hobby Lobby, TJ Maxx/Marshall's, and Joann's.  I saw the idea of labeling the spines or sides with a Sharpie on a craft organization group on Facebook that I am a part of, thought it was brilliant, and had to duplicate it:


Labeling the sides makes it so much easier to pull the collection I want, and I use these paper pads all of the time when I am pulling papers for my monthly stash kits (I'll show you how I store my kits another day). I also have them grouped by manufacturer, just to make it a little easier. This saves me so much time when making my kits, because I don't have to pull out all of my paper pads to find the right one! I have a pretty good memory for what most of these paper pads contain within each collection. And yes, I still have some Hot Off the Press booklets of paper. Anyone else? Or is it just me? LOL!

My loose papers and cardstocks are sorted by color into Cropper Hopper Paper Holders , which I also found on WalMart.com for about $6.50 each.

I made the labels myself with some chalkboard label downloads and sticker paper, and cut out by hand.
The only thing I don't like? They are jam packed FULL, especially the Brown and Cream bin. Which means I can't purchase loose paper without using or getting rid of some. Oh well, I have realized in doing my craft room that, save the occasional adhesive purchase, I have enough supplies to scrapbook for a LONG time with out buying anything at all...but, new goodies are so much fun! I guess a mini freeze on scrappy spending until Christmas might not be too painful. We'll see...

How do you store your scrapbook papers? Link me up or leave me a comment,  I would love to see!

Monday, August 11, 2014

Monday Morning Inspiration and Sharing

Does anyone else get a case of the "Monday's" like me? You just feel a little tired and blah, and uninspired? Well, I was looking through my photos and editing a few (basically because I didn't feel like doing anything else yet), and I realized that I had never shared the layouts that I made in a class I took a few months ago. If you have followed my blog for very long at all (as I know most of you have), you already know that I am a big fan of Shimelle Laine a.k.a. Glitter Girl. And, when she gives a class I generally try to join in. Her most recent class was a Return To the Collection , a spin-off on a popular class that she gave for True Scrap a few years ago, called The Perfect Collection , which was all about using a collection pack up from start to finish (or really, just about overcoming your fear of cutting into those pretty papers!). The Return to The Collection was  focused on using a single collection, but also inspired us to add in embellishments and stamping to complete our pages.  I signed up with the early birds, and was lucky enough to be given access to the first Perfect Collection class for a week. I used the first class as it was meant to be used, cutting by the pdf diagram, etc, and then jumped back in to do the second class. Here is a look at the pages the that resulted from the second class, using Glitz Designs Wild And Free Collection:
"Enjoy":

journaling reads:
 "S'mores by the fire; Fun time together with our family always seems to include some type of yummy food."

"Happy Hikers": 
journaling reads:

  •  Finding walking sticks
  • Swimming under the falls
  • Braving the open sheer cliffs
  • A rainy day for a hike
  • Treasured moments to remember of time spent together
"One of the highlights of our first trip to John and Trina's cabin was definitely the hiking! We braved a few steep trails (and sore muscles on the 2nd hike), but it was worth it to see Greeter Falls and The Great Stone Door. Sept. 2012"

Flip Day Fun: 
journaling reads: "In honor of "Flip Day", Maggie Moo's gave away ice cream-if you could catch it! I'll get serious to catch Red Velvet Cake Batter Ice Cream!"

Must See:

journaling reads: "Bethany told me about this treasure in GA-a wonderful nature center. Lots of plants and animals to see-and it was FREE?! Can't beat that! Of course I made the kids pose on the wooden alligator! 7/24/2013"

This Is What Happy Looks Like:
journaling reads: "I don't know what it is, but being around Molley makes you act so silly! "Pawface" and "Cutie Patootie" are often heard, along with lots of other baby talk and the occasional "snuggle muffins." It it so funny to watch! Molley&Natalie 11/18/2012"

To Cool To Smile?
journaling reads: "Ahh... those wonderful teenage years, when you are still young enough to want to play (sometimes), but you don't want us to see you having fun and enjoying it! I get a glimpse of it in your eyes every once in a while, though! 7/14/13"

Silly, Fun, And Colored Tongues:
journaling reads: "An afternoon at the mall in Newnan, GA, finished with a trip to the candy store. Pixie sticks & blue Icees equal colorful tongues to show off for mom's camera. July 23, 2013"

If you stuck with me for this long, thank you!  If you are in need of some crafty inspiration, why not take a class? I highly recommend Shimelle's classes if you are looking for an easy to follow, inspiration-based class! Leave me a comment and let me know what you think!

Wednesday, August 6, 2014

Workspace Wednesday

I haven't forgotten my promise to show you my crafty space when it's all finished, but for now, I will keep showing you bits and pieces, as I put them back into the room. I am ever so slowly getting all of my little bits unpacked and organized. I have decided that, as I am a very visual person, the best type of organization is by color. So, here is a peek at some of my pretties as I sort and put them away:

A spice rack for brads that I picked up at a garage sale, and I spray painted (my room's accent colors are red and turquoise), and punched pinked circles to label the lids:

A rolling cart of drawers that I purchased with a gift card on line for my flowers (still working on sorting and filling this as I have tons of flowers):


Now, any ideas or inspiration for using all of these flowers?

Friday, August 1, 2014

I Have Fun News!

I am back on the Master Forgers' design team for the Counterfeit Kit Challenge Blog again! When I had to step down last year, because of selling our house, packing, and moving-it made me sad, because I have such FUN making these kits! Well, I am happy to report that I am back on the team! Which means I am sharing a kit today for your August inspiration.  We were asked to make up kits from our stash based on the fun and fantastic Studio Calico Penny Arcade kit:

And here's my stash kit that was inspired by Penny Arcade, "Summer Solstice":

This was a quick stash dive for me-luckily I know where all my stuff is now. I got the invite yesterday, and I had about 45 minutes to pull my kit and photograph it before I headed off to my kids' open houses for school. It was fun to just go with my gut and pull out the first thing that I thought of that would work for my kit. I started with the map print paper- I knew I had one very similar to the one in the SC collection  in my Crate Paper Storyteller Paper Pad, and my kit just took off from there. I pulled a couple from Crate Paper's "The Pier" collection (yellow polka dot and doily clouds), the coral polka dot from Dear Lizzy's Polka Dot Party, yellow stars from American Crafts My Girl, a large monogram print from Cosmo Cricket Circa 1934, and 2 sheets from Glitz's Finley collection. I didn't have time to make fringe, so I grabbed a yellow ticket style washi and a white washed woodgrain washi instead, a couple of doilies, a template, a pack of stickers from Basic Grey, wood veneer from Studio Calico, brads from Cosmo Cricket, badges from Studio Calico, some new chipboard cameras. Oooops-got ready to photograph and realized I had forgotten the letter stickers-so I added in a pack of chipboard alphas from We R Memory Keepers. I am quite happy with my "quickie kit"- I may have to add in a bit of mist and cardstock later, but I am fine with that!