Showing posts with label Craft Tutorial. Show all posts

Saturday, April 25, 2015

Saturday Scrapbook Stamping: Inspired by Wilna/Stamping With Mist

I am still feeling very inspired by Wilna Furstenberg as I prepare for today's edition of Saturday Scrapbook Stamping. This page was inspired by a layout that she did for her Art and Design workshop at the old Big Picture classes. My page is a little different from Wilna's, but I did want to share what inspired me to get started and go in this direction. I am also using some of the cut files that she included in the class downloads (the die cut title and light bulbs).

This will be an adventure, as I have never stamped with mist before. Won't you come and learn with me?

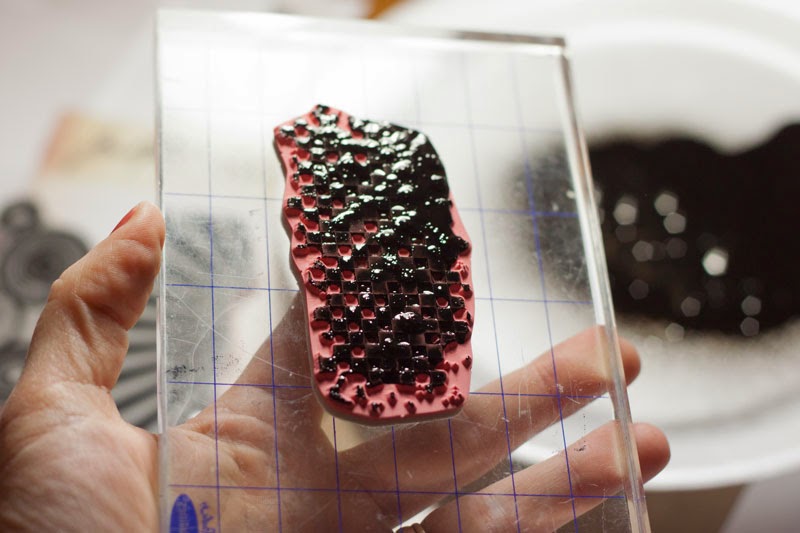
I started by spraying mist from my April kit into a styro plate:
 I then selected some stamps-Tim's stamp set should give just the grungy look I want:


And inked it up. As you can see, the mist pooled quite heavily in some areas:

So I stamped a few times before inking again, and repeated across the center of the page:

I liked the look at this point, but felt like it needed a bit more. So, I dripped the remainder of the mist onto the page:

And this is how it looked when I was finished:

I still wanted a bit more variation, so I gave it a quick shot of mist from about 12 inches above for a fine mist, and then took the nozzle out of the bottle to make few more small drips and splatters with the straw:
 *WARNING! Spraying from high above it did cause the mist to over spray my craft mat a little bit!

I liked it at this point, so I let it dry while I did my die cutting, and then mounted it to a sheet of black and white cardstock from my kit:

Now I decided to have a bit of a play with my homemade texture paste:

I wanted it to be yellow, so I dumped some homemade yellow mist (I thought I dumped too much, but it turned out about right):

I mixed it up and added a spritz of Gold Lame as well:

Then I put the light bulbs on the page where I wanted them to be:

And picked them up one cluster at a time, and added a thick layer of the colored paste:

And then set the cut files on top of the paste. After they dried a bit, I pressed them down into the paste a little bit more:

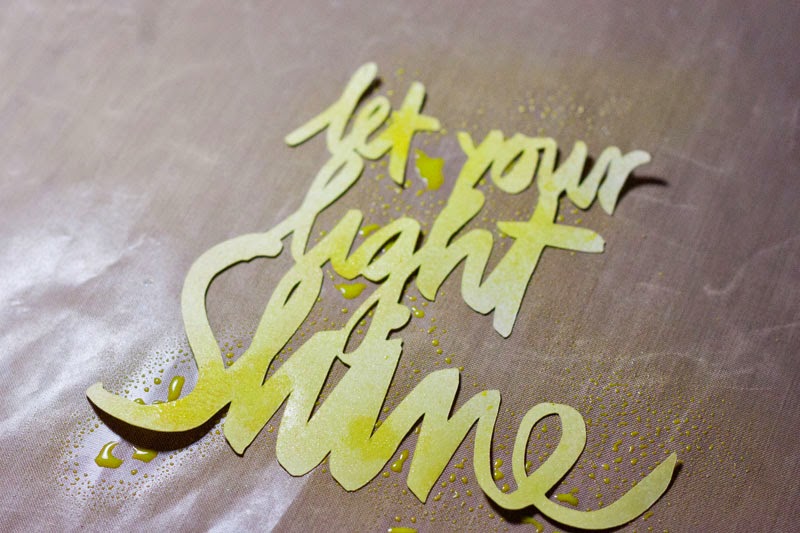
I die cut the title out of a light yellow cardstock scrap, but it was too light, so I decided to mist it with my homemade mist:

There, I like it better already!

I added my photo (after rounding the corners and doing an offset mat on two PL cards from my kit), some scraps, some of the yellow vellum hearts, and some of the black sequins, and a few dabs of Paper Glaze where the light bulbs hadn't adhered completely, adhered the title, and came up with a fun, artsy page, very much inspired by Wilna, that used quite a few bits from my kit, and stamping in a different sort of way!


I hope I inspired you to break out your stamps today!

Saturday, April 4, 2015

Forgeries on the Fourth: DIY Texture Paste

Welcome to Forgeries on the Fourth, Where we help you make all of the various bits and pieces for your kits. My forgery today is not in the inspiration kit exactly, but was inspired by the inspiration kits' name instead. As soon as I saw that we would be counterfeiting the Messy Box, I knew I wanted my kit to be a messy box of a different sort. I wanted to play with paints and stencils this month, and I knew that a texture paste would be a good addition to my kit. I have had a few recipes for homemade texture paste pinned for quite some time now, so this was just the push I needed to make some. And of course I will share how I made my version!

Here are the ingredients for the paste:

White paint (any brand is fine), cornstarch, glue (I just used Elmers' school glue), and a container.


I started with the Cornstarch (about 2 TBSP):

Then the paint-I just squeezed enough to cover the cornstarch. I ran out of the one kind of paint, so just kept going with another brand that I had on hand. I am not super picky, just go with the flow. And I added the glue ( about 1 TBSP)::


I stirred and then added a tiny bit of cold water mix it a bit better, as it was still a bit lumpy. Tip: stir with a knife rather than a spoon, it is much easier.

I wanted my paste to have a bit of sparkle or shimmer, so I added a couple of teaspoons of Rock Candy Distress glitter.We'll see if it works or not, it is all about creative play and experimentation today, right?


I wanted to see how it worked, looked, and dried, so I decided to apply it through the stencil in my kit. My stencil is 6x6, and my page is 12x12, so I decided to apply it across the center of the page. I applied with an old gift card to the outer two edges first,


 and then to the center a few hours later, after the outer edges dried:


I am excited to see where the next month takes us, and trying out a few "messy" additions to my pages.

Wednesday, March 4, 2015

Forgeries on the Fourth: Crafting My Own Bits and Pieces

When I look at the monthly Counterfeit Kit Challenge kits, I usually try to substitute something from my stash, but, from time to time a certain piece or two from a kit will catch my eye, and I know that I can usually alter something or make something from my own stash that will be very similar.
First item on this month's agenda, this paper from My Mind's Eye Jubilee Tangerine:


I didn't have it, but I knew I could make a lovely stamped woodgrain paper! I chose a rich woodgrain paper from Cosmo Cricket. I only had one hot air balloon stamp that I could find, in a mixed set from Hero Arts. I hadn't used it yet, so it seemed like the perfect time to break it out.


I used a couple of different sentiment stamps,


Which I cut apart and rearranged to fit the space. I stamped the images with white ink, then heat embossed. Ireally wasn't happy with the messiness of my embossing (I got in a hurry and didn't brush off the excess, so it had white speckles around the image). I just decided to embrace the messiness and add more!
I spritzed it with gold lame Color Shine across the page on the diagonal, and then dripped Mr Huey's (dark gray) and watered down white acrylic paint, then splattered the white paint some more by flicking my paint brush.

This is what it looks like all dried up:
(It says: "The best memories inspire the soul")

I also was quite enamored with the Doodlebug Doilies that were in the inspiration kit:


But, again, I knew I could make something similar from my stash. It's the reason we buy die cutting machines and tools, right?

I grabbed one of my favorite doily dies, and my folder of blue scraps:

I pulled out several scraps that I thought might work, and laid them on top of my kit papers to see which ones would best suit the kit:

I came up with four scraps that I like quite a lot to go with my kit:


And made myself four adorable doilies to go in my kit:


And the last little tidbits that I decided to counterfeit were the exclusive cork tags. I , and my Tim Holtz tag dies and a piece from my 6x6 Cork Stack, and put my Cuttlebug to work again:


I quite like the little cork tags and bits:

I hope I have inspired you to rethink some of your own stash!


Products used:

Thursday, February 12, 2015

Treats for Valentine's Day

Sharing a look at the classroom pass outs that I made for the twins to carry to school today. I found the cellophane bags at Hobby Lobby for 75% off after Christmas, and I knew that the red and white swirls would be perfect for Valentine's day (and when you have 4 kids you save money wherever you can!). I snatched them up for less than a dollar,and filled them with a bit of candy and a pencil (my kids love the cute pencils they get on holidays, and I know I appreciate any treats that they get that aren't sugar!).  I dusted off my Cricut Expression to make the tags, using the Sweethearts cartridge. It has some of my favorite designs of all the Cricut carts that I own, but I have found that it is also the most difficult to get a clean cut from, as well. Here are a few tips for getting a clean cut:


*Biggest tip: make sure the paper is fully adhered to the mat! If it slides around, obviously, it won't cut cleanly. If it is only partially adhered, it is more likely to snag the tiny blade. I use a pan scraper from my kitchen for this, but you could use an old credit card or store loyalty card just as easily.

*use a mat that is sticky (if you want to know why, see #1 again!)

*Not too fast, not too slow. I used speed 2, pressure 4

* Smooth cardstock works better. I only had textured in the white, though, so I worked with what I had.

Looks ok, though I see a few problems:

And a few more when I peeled off the outer edge:

*next tip-work slowly removing intricate designs from the mat
*"weed" the image from behind, in case the cardstock peels or rips slightly-then it wont show when glued to the back tag.
Not too hard, and I cut the backgrounds out of smooth red cardstock, and they cut perfectly. This is the completed treat bag:

and a lovely pile of treats for the twins to carry to school:
All they had to do was sign their names on the back ! For the tags, I used the scalloped heart tag on page 34, cut at 2 1/2 inches, and the background was the tag on page 79, also at 2 1/2 inches. I cut using the paper saver and auto fill functions, and it only took 2 sheets of cardstock for each color.

Tuesday, September 16, 2014

CKCB Challenge #3: Mixed Media Embellishments

Since I rejoined the Master Forgers' design team, I have been charged with the responsibility of inspiring our members and friends for the third challenge of each month. This month's challenge is a fun one; Make Your Own Mixed Media Embellishments.  I thought that the embellishment size was the perfect way to "stick my toe in the water" of messy mixed media fun, and try out a few of the ideas that have been floating around in my head for a while. I knew I had a sheet of rather plain burlap embellishments from Little Yellow Bicycle, so I pulled those out and set to work.

I gessoed a scrap of off white smooth cardstock.
I swirled it with my foam brush and it rather reminded me of frosting....mmm, frosting...my favorite is the seven minute whipped frosting, it tastes like the best marshmallow topping...anyway, where was I? Oh, yeah...mixed media embellishments ;-) 

I have been thinking about and picturing watercolor butterflies everywhere, so that was my main idea here. I stamped the Jillibean Soup stamps with Staz-On:
 And painted them with my Prang Glitter water colors (I didn't worry about staying inside the lines since I knew I would be cutting the butterflies out):

 While I was waiting for the butterflies to dry, I thought I would work on a few of the burlap shapes, so I sprayed and splattered some Color Shine on one:
 And I stamped another one, and colored the heart shape in with a glitter marker:


 When the butterflies were (almost) dry, I stapled them to one of the burlap shapes, and added some Stickles and gems to their centers.


 I am quite happy with how my little embellishments are looking, and now I am trying to decide  exactly how I want to use them on a project! I hope I inspired you to get a little messy today and make a few embellishments (or frosting, that would be good, too!). I would love to see if you do! Be sure to link up at the Counterfeit Kit Challenge blog!