
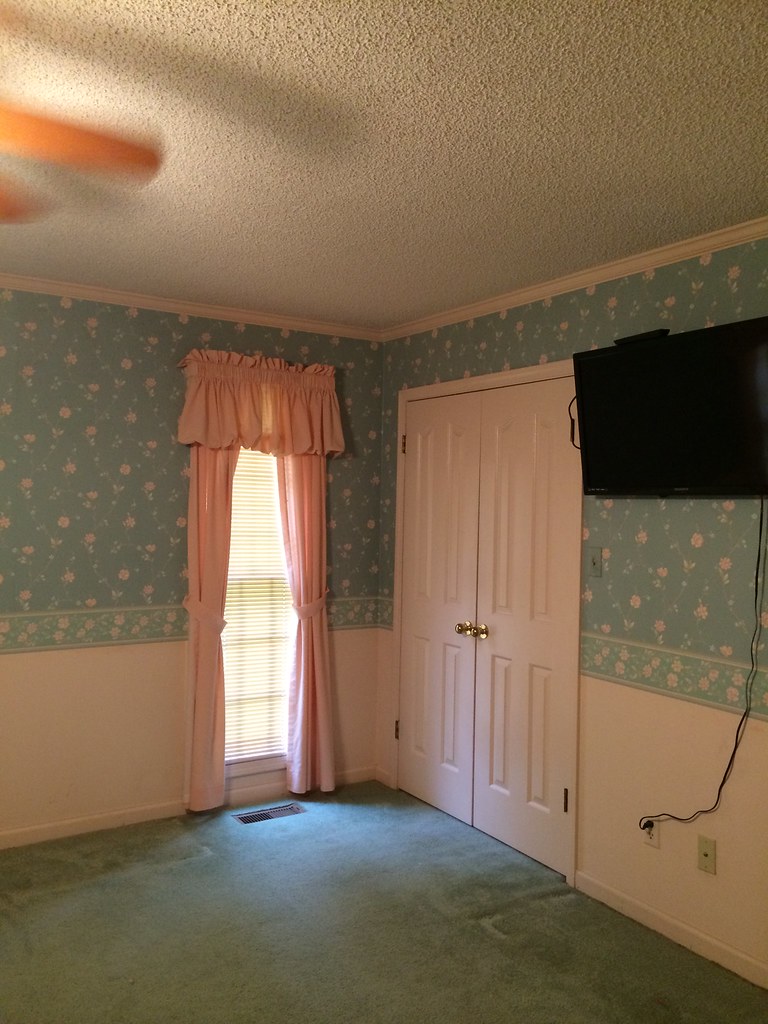
Normally I would show a glimpse of my craft room today, but since that's not where I am working right now, I will give you a peek at some iphone photos of what I am working on- my master bedroom. Note the peachy pink walls, trim, and doors. Brass everything, circa 1985. And the best part- the mint green carpet! Awesome, right? I meant, mint green is a pretty color, but...for carpet? Maybe not. We started a couple of weeks ago removing wall paper. Unfortunately, it was good wallpaper (20 years ago). Therefore, it was super thick (the steamer didn't loosen it), and it was pasted on. With A LOT of wallpaper paste. We spent a week peeling off wallpaper in teeny tiny strips and chunks. Along with chunks of the paper covering the drywall...what a nightmare! We also scraped popcorn off of the ceiling, which is easy, but super messy! You spray the popcorn down with water ( we picked up a new chemical sprayer at Wal Mart so we didn't have to keep squeezing a trigger bottle, we have a pretty large room), make sure it is well saturated, let it set for a few minutes, then used a wide scraper to scrape it off the ceiling.
So our room looked like this:

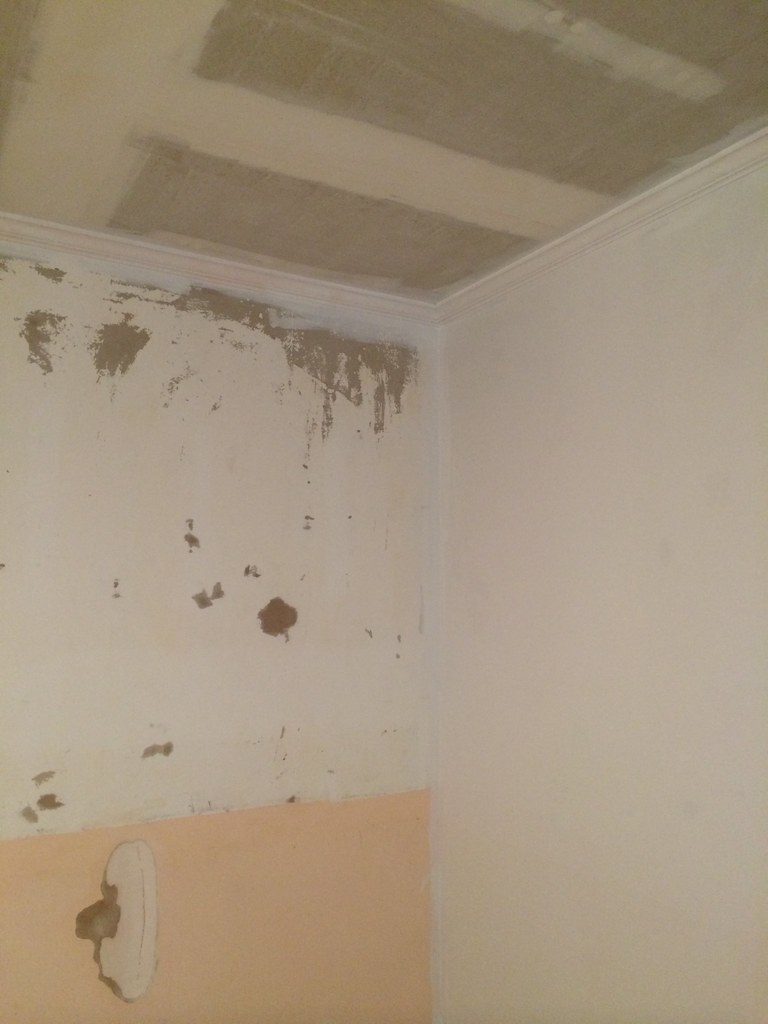
You see all of those spots where the paper came off the drywall? Yeah, they have to be patched. And sanded. And patched some more...AGGGHHH. The prep process is my least favorite but the most necessary part. So. We spent one day spraying the wall down with water, and scraping off GOBS of wallpaper paste (you can't see it in these photos, but it is definitely there!) It took my husband and I working together most of a day to scrape it all off. Then we thought we would see if we could just prime without patching the bare spots. Nope. So we wasted a day priming. Well, I guess the day wasn't entirely wasted, because we did prime the ceiling, which needed it, too. But we could tell that the bare spots were going to show through the wall paint and stick out like a sore thumb. And we discovered that the cheap paint wasn't going to cut it. So, I spent the next 3+ days filling the gashes gouges and tears with this stuff:

And waiting for it to dry, sanding, and finally priming again.
Trust me, I was so over this project by this point!! But, I was finally ready to start painting! So, I went and got some Olympic One flat finish (a flat finish will hide more imperfections than any kind of paint with a sheen, like satin, eggshell, etc). The color I chose was called Royal Palm: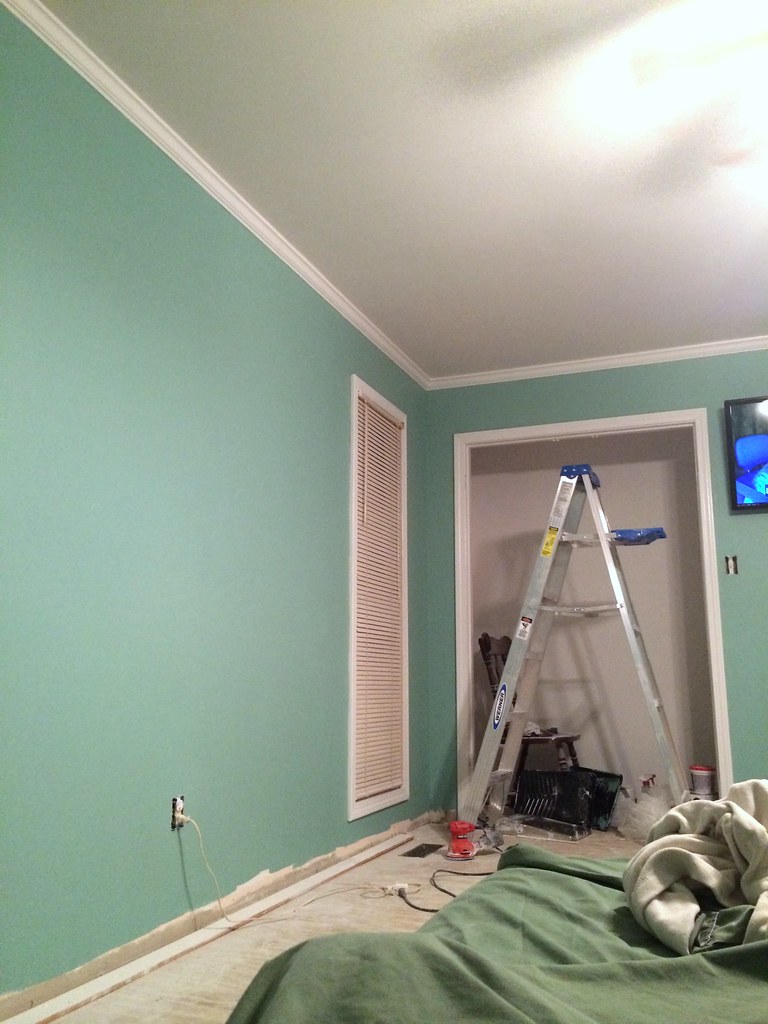
And this is very close to what my bedroom looks like right now. A construction zone, with mattresses on the floor. I'm hoping that my hubby will get enough time off this weekend for us to put in the floor, as that is something I am not quite prepared to tackle on my own. Fingers crossed! I am so ready to be done with this room! Today, I will be putting a second coat of white (Olympic One Silver Feather, to be exact-the trim color I am putting throughout the whole house) on the doors, and hopefully the hubs will be able to come home and change out the ceiling fan for a new, more modern and updated one, and replace the electrical outlets (they're all outdated, painted over in peach paint to match the old walls, and loose, cords just fall out of them). Luckily he has worked in construction, and is very handy and able to do all of this pretty quickly. He'll replace all of the old outlets and switches with new white ones, and it will look so much better! Tomorrow, maybe the new plantation blinds can go up. So, there you go. That's what I'm working on. What about you? Do you have any renovation nightmares to share? Or are you getting crafty and doing fun projects for fall or your scrapbooks? If so, I'm a bit jealous, but I'd love to hear about it!
Ohhhhhh looking good!!!!!!!!
ReplyDeleteThanks, Julie!
DeleteOh that is a lot of work, but you will be so pleased with the redo, I'm sure. Greens are such a calming color for bedrooms. We are doing a lot of work on my son's new home. Taking down wallpaper was this weekend's chore - we finished the dining room and the master bathroom in less than 8 hours, split between 2 days. We used a solution that you just applied to the wall with a sponge (no steaming, no spraying), and it worked pretty darn well. We have yet to start the spackling, but mostly have very small spots to fill in. By the way, I discovered in the past that if you just soak the outlet cover plates in water, the paint will just peel in one layer. And then I used pick to get paint off the part where the plugs are. But since yours are loose and you want to change them to white, you will have to change them out. The same works for heating registers too. Good luck with finishing up.
ReplyDeleteThank you for such a thoughtful response! I have seen those chemicals, but wasn't sure if they were worth the extra money-sounds like they would have been! The other tips are good to know too, I will fill that away in my brain for future reference. Thanks so much!
Delete