Showing posts with label Cricut Plantain Schoolbook cartridge. Show all posts

Monday, February 27, 2012

Best Buds

Today, I am sharing a layout that I made for Creative Scrappers, sketch # 195.
The sketch:
The layout:
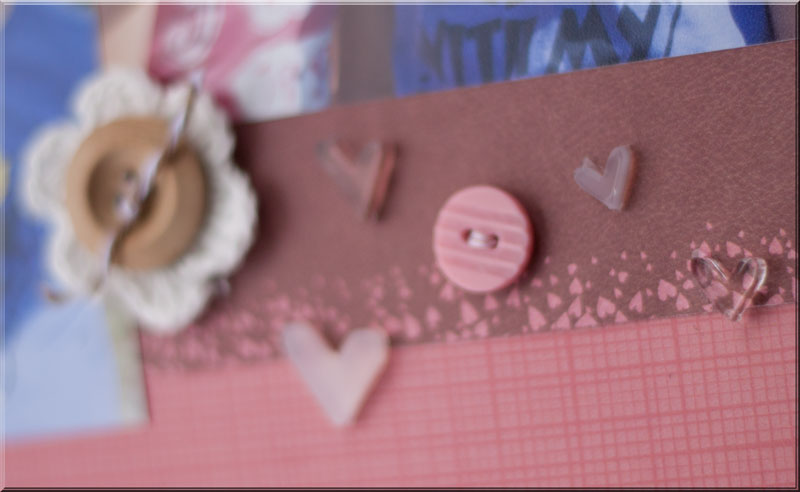
 A close-up look at the embellishments:

I used papers from my February Counterfeit Kit, and from my scrap basket: background paper is a beautiful embossed with glossy hearts by Coud 9, cork paper, striped paper from Cloud 9, scraps from Basic Grey, Cloud 9, and chatterbox, a die cut tag, wood button, and crochet flower- all leftovers from my December Daily "Cozy Christmas" kit, clear acrylic heart shapes from Heidi Grace, October Afternoon Sidewalks buttons, letter stickers from Pink Paislee, and kraft letters that I diecut with my Cricut and Plantain Schoolbook cart, and corrugated with my Fiskars crimper.

Friday, February 24, 2012

Time to Start Sharing!

February has been such a busy month for me! But I do want to share what I have been working on!
I made this layout for the sketch challenge at Creative Craft World:

The sketch:
Supplies I used were all from my February kits:  patterned paper from Making Memories and Cosmo Cricket, paper doily from Wilton's that I inked, journaling card from Cosmo Cricket, October Afternoon Little Flyers and Chipboard Journaling spot to be filled out, Martha Stewart heart doily stickers, and corrugated letters that I made with my Cricut, Plantain Schoolbook cart, and crimped with my Fiskars crimper, then brushed with bit of white paint.

Next to share: My projects for the Counterfeit Kit Club Doily Challenge!
We were told:
Challenge #2: Doiley Challenge! Glue it, punch it, stamp it, but use it on a project! Let's see how many uses we can find for doileys!
Here are my layouts for the challenge:
paper layout:

For this layout, I combined the doily challenge with the February Sketch Challenge at Sketches 4 All: (with a love or Valentine theme)

Isn't it a beautiful sketch?You still have a few days (till midnight on the 29th of February) to submit an entry for a chance at an RAK!

Supplies used: Basic Grey and Chatterbox{this came from my ancient stash but I still love it} patterned paper, Making Memories rub ons, Wilton's paper doily, Cosmo Cricket word and border  stickers, printed chevron digi paper was die cut into hearts using my cricut and Plantain Schoolbook cart, pink scalloped felt border (I also die cut this for my February kit with my cricut),Martha Stewart pink heart doily sticker, Lush stick on rhinestones by My Mind's Eye, Heidi Grace clear heart attached with Glossy Accents, stamped "Love" ticket was die cut with SCAL, and flowers are from Petaloo and my stash.

Here is my digi page for this challenge:

I used my February Counterfeit Digi kit for this one! Most of the papers are from Design House Digital, by Agnes Biro.I used the typewriter key alphas from my January digi kit for the title.
 My hubs hates this photo of himself because of the scruffy beard, but the emotion behind it is so precious to me!!
More sharing to come!

Wednesday, February 15, 2012

Love Notes

Well, I know Valentine's Day is past, but I still have lots of Valentine's day layouts and projects with my Counterfeit kit that I haven't shared yet, and that doesn't even count the pictures I haven't printed yet from this year!So, I guess you get to share the love with me for a little while longer ;-) Today's layout is one that I did for the Counterfeit Kit challenge blog. They challenged us:
LOVE LETTER CHALLENGE: Include a "love" letter on your layout to let that person know how much they mean to you.
Here is my layout:
I used the February 1st sketch from Stuck Sketches:

I chose to write a "Love Note" to my son-I worry sometimes that I don't tell him often enough how much I love and appreciate him, so I jumped at the chance and I am so glad I did!!

Supplies used: patterned papers from Teresa Collins, Making Memories, and Basic Grey, with stickers/embellishments from Cosmo Cricket, Martha Stewart, Echo Park, Pink Paislee, and Heidi Grace. The corrugated letters are cut from kraft paper with my Cricut and Plantain Schoolbook cart, and run through my Fiskars crimper.

The beautiful photograph was taken by a photographer friend of mine, Nicole McCoy.Love how it shows his soul in his eyes! And I have always loved his eyes!

Wednesday, September 29, 2010

Love To Read...

This week, I am sharing a couple of pages that I made for my kids' elementary school scrapbook. I used the Stack of Books digistamp from Lindsay's Stamp Stuff School Rules! digistamp set I used papers from Sassafrass Lass Bungle Jungle, a sketch from 4x6 Sketch Blog, my Cricut and Plantain Schoolbook cartridge for the star and circle shapes, and a Tim Holtz ticket.

Thanks for stopping by today, now head on over to the other designers' blogs for more inspiration and a freebie!
Lindsay Weirich (Owner & Stamp Designer)
Cheryl Gorka (DT Coordinator)
Cindi Hooks
Diane Bove
Jennifer Bliss
Karin Martin
Laurel Seabrook
Leanne Garner
Lisa Jurecek
Margie Visnick
Melissa Craig
Micki Harper
Rhonda Walker
Shannon Neparko
Tamara Bennett
Tracey Allen
Tracy Vinson

Wednesday, September 8, 2010

Thursday With Lindsay's Stamp Stuff

When I was asked to do the scrapbook for my children's school, I immediately thought about the School Rules digistamp set.I used the ribbon banner from the set, and have plans to use more from the set, since it goes so well with the theme! I used patterned paper from the DCWV Grade School Stack (finally, a Stack I "might" use up!), and from Sassafrass Lass Bungle Jungle Collection, regular staples, and the lettering is cut with my Cricut and Plantain Schoolbook.
The challenges that I am entering this layout into are:

Thanks for dropping by my blog today, now head over to Lindsay's blog for a freebie and a mini tutorial, then on to the other designers' blogs for lots of Lindsay's Stamp Stuff projects:


Lindsay Weirich (Owner & Stamp Designer)
Cheryl Gorka (DT Coordinator)
Cindi Hooks
Diane Bove
Jennifer Bliss
Karin Martin
Laurel Seabrook
Leanne Garner
Lisa Jurecek
Margie Visnick
Melissa Craig
Micki Harper
Rhonda Walker
Shannon Neparko
Tamara Bennett
Tracey Allen
Tracy Vinson

Thursday, June 24, 2010

Twin Beauties *scroll down for Lindsay's Stamp Stuff post


I am determined to get some scrapping done this summer!!And all of those fantastic sketches that are available are really helping me get it done! And having great papers and flowers (and sweet pictures-more than anyone can count) really inspire me! This page is based on this week's sketch from Sketch Inspirations. I started with some yummy Prima patterned paper (I tell you , I hated covering any of it! I arranged my layering pieces, and chose a pale pink vellum for the largest piece, in order to cover as little as possible of the beautiful background paper (the back was beautiful too... I so hated that none of it was being used! Anyhooo...the pinky/red patterned paper is Basic Grey, the embossed green cardstock is Bazzill Swiss Dots, the circle is a cream shimmer paper, cut with my Cricut and Plantain Schoolbook, the Roly Poly circle from page 72, and the title lettering is American Crafts Thickers fabric letter stickers. The three larger flowers are all by Prima- the Blue hydrangea flower is one that I layered and added the gems to the center of, the pink one started out as plain white flowers (single layer) from Prima's "e" line, that I add Bed of Roses and Ruby Shimmerz to, then lightly inked with a hot pink Hampton Arts ink pad, and a Tim Holtz Tattered Rose ink pad. After all of that inky fun (hubby just laughed at me and asked what I was doing on his wood floor), I layered then all together with a pearl brad and a crumpled, inked and folded paper doily. BTW, I put a sheet of cardboard down on the floor before I sprayed ;-) . The tiny pink roses are some that I found while scavenging through my grandmother's sewing box, and the other tiny flowers and brads are from Making Memories

Challenges I am entering this layout into:

Thursday, May 13, 2010

Handmade Flowers

I love flowers! I have seen so many tips, tricks and tutorials for handmade flowers, so when I saw this flower swap on 2 Peas in a Bucket, I jumped on it for the chance to try out some of the techniques I've seen. I also took some of the challenges that they were giving in the Fantabulous Cricut Crawl...
1. Diecut Flower Power
8.Inking/Drawing on die cuts
10. Paper piecing (use the Layers function)

Now, here's how I made the flowers:
1. Pink- I crumpled a bunch of white paper doilies and sprayed with Glimmer Mist and Shimmerz of various pink shades, then waited until they were completely dry and smoothed them out carefully (they rip easily, so be careful!), and layered with a drop of hot glue in the center. Then, I took a wide pink satin ribbon (about 2 inches, I think), pinched it in half longways (did I just make up a word?), and secured the end of the ribbon to the center of the doily flower with a drop of hot glue. Then, just keep pinching, twisting, glueing, and wrapping around in a circle, until you are happy with the look of the flower. When you are finished, just tuck the end of the ribbon under the twisted ribbon flower.
2.Blue- I had already joined this swap when Lindsay (Lindsay's Stamp Stuff) debuted her 3-d Flowers Svg Set, and I was SO excited, because I knew that it would be perfect to try for this swap. Instructions for assembling the flower are included with the purchase of the set. Before I assembled the flowers, I inked the edges with a light blue Bic Markit, then painted the flowers with Angel Wings Shimmerz. After they were dry, I assembled the flowers, shaped the petals with my fingers, and then put a drop of Martha Stewart Glue for glitter in the center of the flower, and sprinkled brown and black Doodlebug flocking.
3. Yellow- for these flowers, I cut out this awesome freebie svg file from Svg Cuts, inked the edges of each layer (with Copics and Bic Markits-I love using markers to ink the edges of intricate cuts, it makes it easier to get into the little curves), rubbed the center layer of the flower on a glue pad, sprinkled with glitter, then sprayed a clear acrylic sealer on the layer. I glued the layers together with a quick drying glue, and curved and shaped the petals and flower centers with my fingers, and did a fine line of yellow Stickles around the center of the daffodils.
4. Neutral (Black and Cream)-another one of Lindsay's Svg 3d Flower Files, I made these flowers with some yummy flocked paper by GCD Studios, shaped the petals with my fingers, and spritzed with Truffle and Treasured Hymn Shimmerz.
5.Green- First, I printed out a sheet of olive Uptown Houndstooth paper from Lindsay's Stamp Stuff. I cut circles out of kraft cardstock, and the leaves using Plantain Schoolbook, scalloped circles of the Uptown Houndstooth using the Storybook cartridge, and the smaller scalloped circle is a Martha Stewart punch, and I inked and assembled, and added a rhinestone to the center.
6. Red- I Love red poppies, so I attempted to make my own. I punched a 1 3/4 inch circle of dark brown cardstock, then attached LOTS of layers of punched red tissue paper scallop circles, and fluffed them out with my fingers. Then I punched a small scalloped circle out of the dark brown cardstock, then added dots of Martha Stewart glue for glitter, and dusted the centers with Martha Stewart Onyx and Brownstone glitter.

These flowers are so versatile-look for them in my upcoming projects, cards, scrapbook pages...I can't wait to use them!Thanks for spending some time with me-I hope the info on these flowers was helpful for you! Now, hop over to Lindsay's blog, and the other designers, they always have some crafty goodness to inspire you!
Lindsay Weirich (Owner & Stamp Designer)
Cheryl Gorka (DT Coordinator)
Cindi Hooks
Jennifer Bliss
Karin Martin
Leanne Garner
Lisa Jurecek
Margie Visnick (you are here!)
Melissa Craig
Micki Harper
Rebekah Doak
Rhonda Walker
Shannon Neparko
Tamara Bennett
Tracey Allen

Wednesday, May 5, 2010

Scrapbook Pal Design Team Entry *Edited to add Photos

*I was very dissatisfied with the first photo I posted of this layout, so I added some photos taken with natural light to show the difference that natural light makes!

Photos taken in natural light:

Photo taken indoors (late at night,lol!) with a flash:
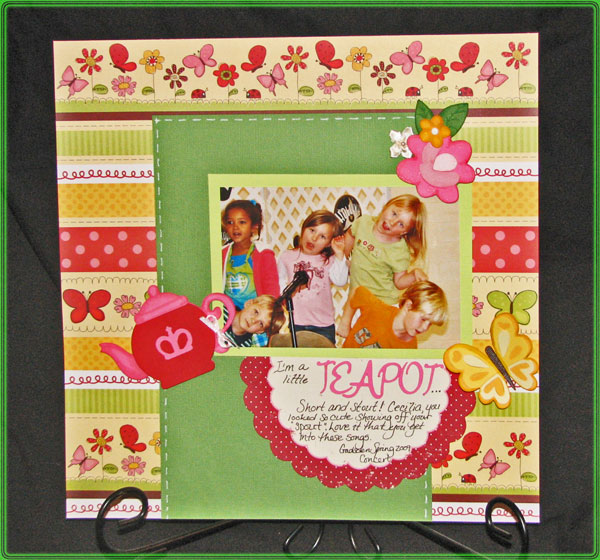
I put this layout together for a Design Team call over at Scrapbook Pal. I used some fantastic patterned paper (just love those colors!), and finally put that Once Upon a Princess Cricut cartridge to good use! The little teapot from p.61 was perfect for his layout, cut at 2 1/2 inches, along with the OUAP font for the word "teapot", cut at 1 inch, the butterfly on p.59, cut at 2 inches,and the flower from p.60, cut at 2 inches. The tiny yellow flower was cut from Plantain Schoolbook, p.76, at 3/4 inch. I shaded my die cuts with Copic markers and shimmery chalks from Pebbles Inc.

Wednesday, April 21, 2010

A quick card for a swap, and a SALE!


Today I am sharing a simple recipe card that I made for a swap on 2 Peas, all about strawberries! My recipe is for my Gran's shortbread. So yummy! I used the Recipe Lines digistamp from Lindsay's Stamp Stuff recipe set, a paper doily from the Dollar Tree, a square of red gingham paper, a free svg file for a strawberry that I picked up on the web, and a white flower from Plantain Schoolbook cartriidge, with the edges rolled, and a dot of yellow stickles in the center.
Now, head over to My Graphico, they are having a 15% off sale in honor of Earth Day!

Thursday, March 25, 2010

A Sweet Little Nest...

Is what I have for you today! I started with this week's sketch from Inspirational Card Sketches, and I used this Nest With Eggs digistamp from Lindsay's Stamp Stuff Birds and Branches digistamp set, and the word art is a freebie that you can find on Lindsay's blog, which coordinates with the Birds And Branches set. I picked up the burlap ribbon on clearance at Wal Mart, and I cut the tiny blue flowers with my Cricut, and just shaped them with my fingers, and the pearls are from K&Co. Thanks for dropping by, now head over to the other gals' blogs for more inspiration and fun!
Lindsay (owner-she has a freebie for you;-) )
Rebekah Doak
Lisa
Melissa
Cindi
Erin
Tracey
Micki
Leanne
Shannon
Tracy Vinson (March Guest DT)

Wednesday, July 8, 2009

Play (July LO#5)


Woohoo! I am rockin and rollin! I rarely get so many pages done in one week! This LO combined The challenges over at 52 Sketches, 52 Weeks, One Little Word (JOY), and How Much Is Too Much (Paint the Town Red). There is nothing that says "Joy" to me more than a child blowing bubbles on a spring day. For "Paint the Town Red", We were to have red in the photo (the bricks), the paper (patterned paper and red mulberry paper), and the embellies(the journaling tags and letter stickers). The patterned paper is from a Me And My Big Ideas stack-it is flocked and yummy! I cut the circles (bubbles) from my Cricut and Plantain Schoolbook cart, 2 out of light blue vellum, and one out of iridescent vellum. The Title is Making Memories Puffy Alphas, and the journaling spots are stickers from MM's 5th Avenue Collection. Oh, and since I got another page done, that's another entry in Lora's Challenge too!

Thursday, June 11, 2009

Bitten By the Bug Contest, Freebies, Stamp Stuff, and More...


So, you may have already guessed this, but I love a challenge or a contest. This one was from Bitten By the Bug and SheetLoads Of Short Cuts. The challenge was to use this sketch, and any flower from any Cricut Cartridge. So I used this darling Cupcake Tree Digistamp ( only a $1.00 from Lindsay's Stamp Stuff!), my leafy flourish svg file (find it for free HERE ) which I also cut in the darker green in SCAL's Shadow mode set at "1", and the flowers were cut from Plantain Schoolbook cartridge at 1/2 inch and 3/4 inch for the 2 smaller flowers, and 3/4 inch and 1 inch for the larger flower. I bent and shaped the petals with my fingers, and layered the smaller flowers on top of the larger ones with mini Glue Dots (I use these like crazy!), and attached tiny pink gemstones in the center of each flower. The patterned cardstock that I used for the card was from the DCWV Nana's Nursery Girl Stack, and the pink lace was my "vintage" addition, from my mother-in-law's sewing stash, and I added interest to the Cupcake Tree with sprinkles made from Stickles, and puffy pink pearlized fabric paint drops for the "cherries". I colored the actual stand that the cupcakes are on with my silver Martha Stewart glitter pen.

Now is the perfect time to try digistamping, because Lindsay's Stamp Stuff is running a special in June: Spend $10.00 and get one of Lindsay's awesome card kits free! (these are awesome for putting together a quick but lovely homemade card!). And if you check out what the other girls are doing, you will find a FREE digistamp on one of their blogs!


Saturday, February 14, 2009

Feb 8


Here's my layout for week 5 sketch at 52 Sketches, 52 Weeks. The papers are: DCWV Rock Star Stack (lips), Bazzill Basics (scalloped circle), DCWV Metallic Stack(circle). I also used Grungeboard by Tim Holtz, black glitter Thickers by American Crafts, and flower by The Paper Studio, rhinestone brad by Making Memories.