Happy March! There's nothing like a good scrapbooking crop and challenges to get my creative juices flowing, and this weekend, Shimelle is hosting one over at her blog:
It was just the boost I needed to get started on my March Counterfeit kit! The first challenge I took was the older photos/monochromatic challenge. I used all the yellows in my March kit, plus several neutrals, such as gray, black, and white. (ps-I love yellow and gray together! Reminds me of sunshine breaking through the clouds!) Here is my layout:
I layered up a bunch of the journaling cards, washi, a frame, a couple of diecuts from my scraps bin, and a few cameras cut from the Amy Tangerine camera paper from my kit, flipped the green chipboard stars over, and inked them with charcoal American Crafts ink (that's actually why you notice a couple of smudges on my page, I tried to put them down before they were fully dry-oops!). I also glittered a wood veneer camera from my kit, and stamped a few of the stamps with the AC charcoal, as well. I love it, smudges and all, because it records a moment in my life that I actually haven't documented yet-my high school graduation. And it does it in a rather unexpected way, by telling what I thought my life was going to be like at that time, and how it is much richer and better now than I could have dreamed. Bonus:I got a great start on my March stash kit! We'd love to have you join us over at the Counterfeit Kit challenge blog!
Showing posts with label washi tape. Show all posts
Sunday, March 6, 2016
Saturday, April 18, 2015
Scrapbook Stamping Saturday...Background Stamping in a Line
I'm back for another edition of Scrapbook Stamping! Today, I am focusing on adding stamps to my background to add texture to my page. Specifically, stamping in a line on the background of my page.
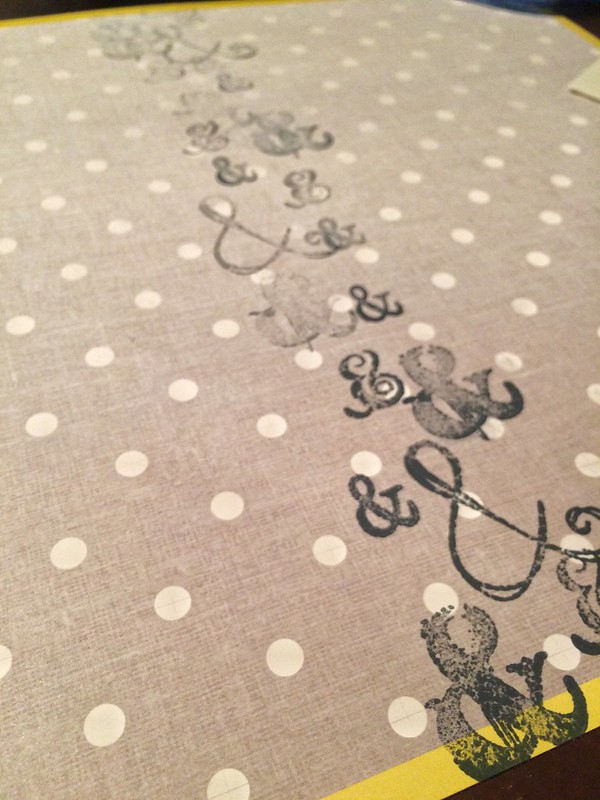
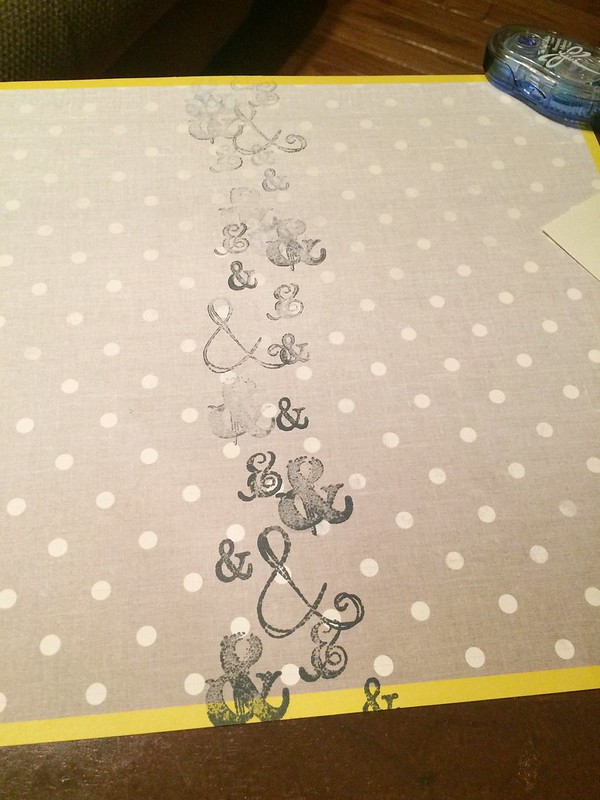
I started with one of the simpler patterns from my April kit and used all of the ampersand stamps from my kit to stamp a pattern in a line:


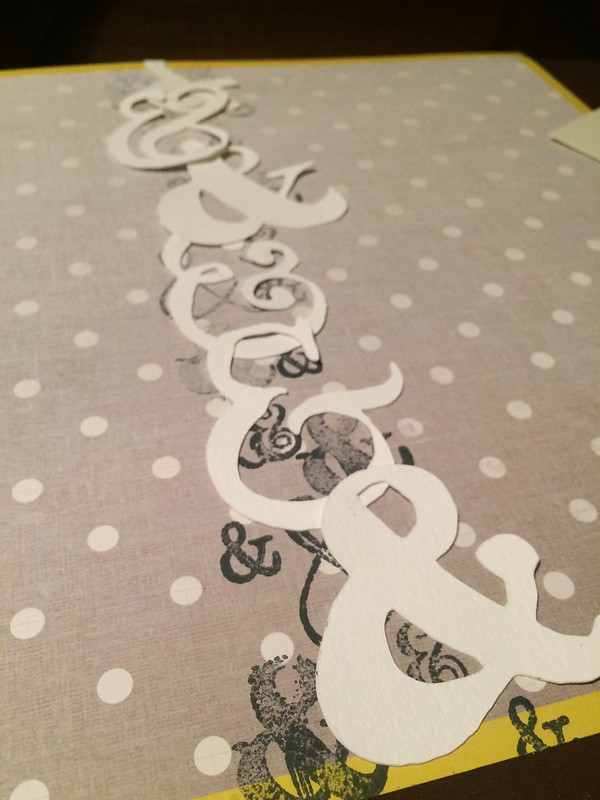
And then I took most of the diecut ampersands from the kit (all were cut files from Wilna's Art and Design class) and layered them on top of the row of stamping:

And added lines of ribbons and washi for my page
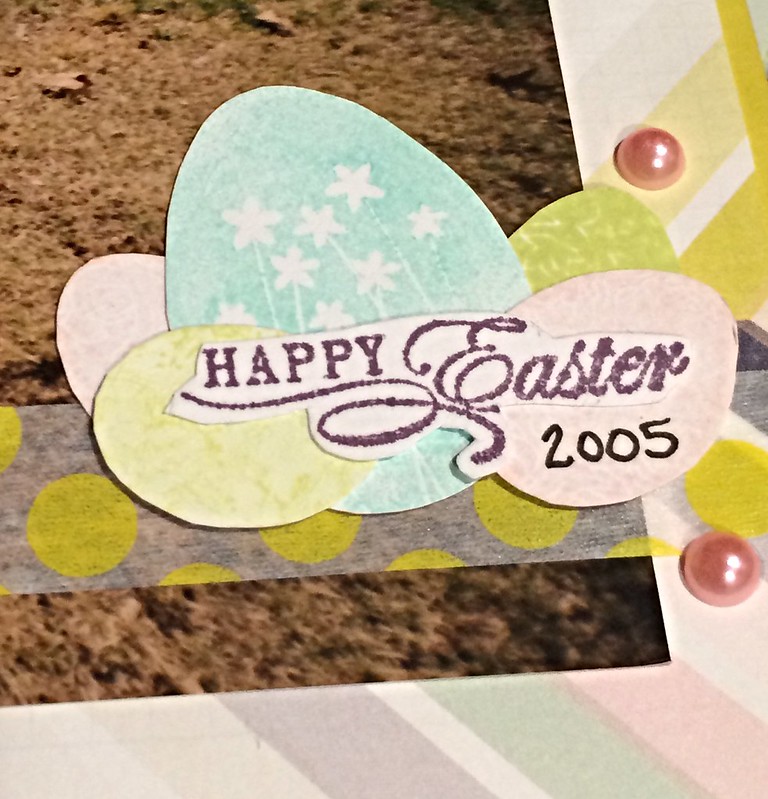
And I have to say, it makes me feel really good to use my stamps on my pages. I am using them instead of just collecting them! The Easter Eggs and "Happy Easter" were also stamped, using some Studio G Easter stamps:

Thanks for stopping by, I will be back on the 20th with a special post for the Counterfeit Kit Challenge blog. You don't want to miss it!
I started with one of the simpler patterns from my April kit and used all of the ampersand stamps from my kit to stamp a pattern in a line:


And then I took most of the diecut ampersands from the kit (all were cut files from Wilna's Art and Design class) and layered them on top of the row of stamping:

And added lines of ribbons and washi for my page
And here is my completed (STAMPED!) page:
And I have to say, it makes me feel really good to use my stamps on my pages. I am using them instead of just collecting them! The Easter Eggs and "Happy Easter" were also stamped, using some Studio G Easter stamps:

Thanks for stopping by, I will be back on the 20th with a special post for the Counterfeit Kit Challenge blog. You don't want to miss it!
Saturday, March 28, 2015
Saturday Scrapbook Stamping: Using Stamps To Enhance your Backgrounds
I am back, as promised, to share what I am doing with my stamp-inspired kit. I have decided to use the stamp set included in the kit in several ways to enhance my layout. The first way I am using my stamps is to create butterfly embellishments by stamping the butterfly stamp in several various colors.
Adirondack Sunset Orange:
After I would stamp a few, I would use my trusty favorite (baby wipes) for stamping to clean my stamp before moving on to the next color:
I stamped in several colors, but my favorite was one of my oldest ink pads, VersaColor Raspberry (at least 13 years old and still super juicy!):
After I stamped several butterflies in several colors, I fussy cut them, and moved on to my background paper. The plan was to enhance the paper and create movement across the page with Walnut Stain Distress ink:
I started in the adjacent corners, making sure to stamp over the edge:
Next, I wanted to enhance the stamping with some splatters of Mr. Huey's:
I let it dry, and then it was just a matter of putting it all together:
I also added pearls to enhance the stamped flow across the page:
I love the feeling of texture and movement, and it was great fun using my stamps and inks on a scrapbook page!
Saturday, March 21, 2015
Scrapbook Saturday: Focus on Stamping
For this past week, I have been think a lot about what I am trying to do with this blog. I first started this blog back in December of 2008 as a way to share bits and pieces of my life, photos, recipes, and all of my crafty endeavors. I have truly enjoyed doing that, and have worked very hard at improving in all of those areas, so it is so much fun for me to go back and see some of my earliest posts. Lately, I have been searching for a way to refresh things here, and keep improving. I have had an idea here or there, but nothing that really stuck with me. Well, last night I was in my craft room labeling my inks (so funny that this is what I chose to do on a Friday night, I must be getting old ).
Anyway, as I was labeling them, it struck me that I have quite a few inks that had never been even opened, much less used. And I have four binders of clear stamps, plus a fair amount of rubber stamps.
And while I love the beautiful designs and the gorgeous colors, I haven't done very well at actually using those collections of stamps. It got me to thinking. What could I do to motivate myself to use all of those lovely stamps and inks that are collecting dust on my shelves? I make cards from time to time, but scrapbooking is my first love, so I would really prefer to find ways to use my stamps on my pages. And then I had my "lightbulb moment". I know that I can use stamps on my layouts, I just need the motivation to remember to use them, and a blog series might do just that! So, my intention is this: A scrapbook segment on my blog exploring my stamps and different ways or techniques of using them. And Saturdays seem like a good time to share it, if for no other reason than that I love the alliteration of "Scrapbook Stamping Saturdays"! So, I made a plan, and I wrote it down, and today is the first one. I have other plans for this blog as well, but for today, we will focus on the stamping.
I found this fun inspiration of making a stamp inspired kit, and, since making up kits to scrap with out of my stash is almost as much fun to me as making actual scrapbook pages, I knew I should definitely try it out to give me a jump start on this blog series. This is the stamp set that I used to inspire my kit:
Anyway, as I was labeling them, it struck me that I have quite a few inks that had never been even opened, much less used. And I have four binders of clear stamps, plus a fair amount of rubber stamps.
And while I love the beautiful designs and the gorgeous colors, I haven't done very well at actually using those collections of stamps. It got me to thinking. What could I do to motivate myself to use all of those lovely stamps and inks that are collecting dust on my shelves? I make cards from time to time, but scrapbooking is my first love, so I would really prefer to find ways to use my stamps on my pages. And then I had my "lightbulb moment". I know that I can use stamps on my layouts, I just need the motivation to remember to use them, and a blog series might do just that! So, my intention is this: A scrapbook segment on my blog exploring my stamps and different ways or techniques of using them. And Saturdays seem like a good time to share it, if for no other reason than that I love the alliteration of "Scrapbook Stamping Saturdays"! So, I made a plan, and I wrote it down, and today is the first one. I have other plans for this blog as well, but for today, we will focus on the stamping.
I found this fun inspiration of making a stamp inspired kit, and, since making up kits to scrap with out of my stash is almost as much fun to me as making actual scrapbook pages, I knew I should definitely try it out to give me a jump start on this blog series. This is the stamp set that I used to inspire my kit:
I love butterflies and this stamp set took me in a rather "Valentine's" direction, as it instantly brought to mind Tim Holtz's Kraft resist, which lead me to think of browns, pinks, and creams. Here are the papers that I chose to coordinate with the stamps:
And here is the kit in its entirety:
I can't wait to play with it this week! It will make some very pretty pages, I think! And I can't wait to explore the joys of stamping on my scrapbook pages with you all. Next week, I will share what I make with this kit, and how I used the stamp set. Be sure to come back for more Saturday Scrapbook Stamping!
And here is the kit in its entirety:
I can't wait to play with it this week! It will make some very pretty pages, I think! And I can't wait to explore the joys of stamping on my scrapbook pages with you all. Next week, I will share what I make with this kit, and how I used the stamp set. Be sure to come back for more Saturday Scrapbook Stamping!
Friday, September 27, 2013
Found One More!
I had one more page that I made from the May JBS kit, that I overlooked with my Kill the Kit the other day. Without further ado;
Just a page scrapping some our summer adventures at the World Of Coca Cola this year-I may add some Coke stickers over the banners/under the edge of the journaling spot, but right now they are packed away, so I will the page finished (for now).
Wednesday, April 17, 2013
Another Day, Another Scrapbook Page...
This time, my layout was inspired by a sketch from the Scrappiest:
Again, I used my March kit (I am loving this kit so much! One of my favorites of all time!!):
I used some of my favorite paper from Dear Lizzy's Lucky charm collection, and other bits and pieces from the kit (the banners were perfect for using up some of my scraps!), an Elle's Studio journaling card, a piece of washi from the washi tape sheet from Maggie Holmes, a few of the Maggie Holmes cut out tags, a few little Jillibean Soup letter stickers, some of the chipboard pieces from the Dear Lizzy chipboard Thickers, and some Gold Lame and Primrose Color Shine from Heidi Swapp.
I backed the cut-out letters with some Lucky Charm striped paper:
I love the yummy Color Shine mist too! I need more colors!
I am linking this layout up to: Simon Says Stamp: Cityscapes or Travel, since the photo is from a trip my family took last year, Layout Love Linky, The Scrappiest, and the Counterfeit Kit Challenge blog
Now...off to see what I can do for this weeks' Glitter Girl prompt...it's right up my alley, since it involves kit-building/scrapping from the limitations of a kit! Ta-ta for now!
Again, I used my March kit (I am loving this kit so much! One of my favorites of all time!!):
I used some of my favorite paper from Dear Lizzy's Lucky charm collection, and other bits and pieces from the kit (the banners were perfect for using up some of my scraps!), an Elle's Studio journaling card, a piece of washi from the washi tape sheet from Maggie Holmes, a few of the Maggie Holmes cut out tags, a few little Jillibean Soup letter stickers, some of the chipboard pieces from the Dear Lizzy chipboard Thickers, and some Gold Lame and Primrose Color Shine from Heidi Swapp.
I backed the cut-out letters with some Lucky Charm striped paper:
I love the yummy Color Shine mist too! I need more colors!
I am linking this layout up to: Simon Says Stamp: Cityscapes or Travel, since the photo is from a trip my family took last year, Layout Love Linky, The Scrappiest, and the Counterfeit Kit Challenge blog
Now...off to see what I can do for this weeks' Glitter Girl prompt...it's right up my alley, since it involves kit-building/scrapping from the limitations of a kit! Ta-ta for now!
Tuesday, April 16, 2013
Another layout from my March kit...
Just a quick post to share the page that I made using Shimelle's Sketch 12 and my March kit:
Love the papers-Maggie Holmes, Pebbles, Amy Tangerine...and I added some of my new Heidi Swapp Color Shine mist, a Tim Holtz mask, some Want 2 Scrap pearls, a Basic Grey Canvas tag, pink chevron washi tape, a flocked Doodlebug brad, a heart from the Dear Lizzy Lucky Charm set fit in the fussy cut camera perfectly, and I put a coating of Glossy Accents over it to make a "lens".
Here is a closer look at the embellishments:
Thanks for looking-I always love to know what you think!
Friday, April 12, 2013
Scrapping up a storm!
Yes, I have been scrapping a lot over the last few days...it's kind of my stress release ;-) So, I pulled out my February kit
and made a few pages:
and this one based on Shimelle's Sketch #9:
(the sketch):
And another take, with my March kit, on the same sketch:
I used Dear Lizzy Lucky Charm, Amy Tangerine Yes Please, and Maggie Holmes for Crate (all of my favorite goodies from the most recent CHA, basically!). I also used Cocoa Daisy and Amy Tangerine stamps from my kit, a white gel pen, and added in a set of embellishments, because I just love these yummy Glitz Giant Rhinestones...
Thanks for allowing me to share with you...now I have to go scrub some floors and do some laundry, to make up for all of my time spent scrapping this week...
and made a few pages:
and this one based on Shimelle's Sketch #9:
(the sketch):
And another take, with my March kit, on the same sketch:
I used Dear Lizzy Lucky Charm, Amy Tangerine Yes Please, and Maggie Holmes for Crate (all of my favorite goodies from the most recent CHA, basically!). I also used Cocoa Daisy and Amy Tangerine stamps from my kit, a white gel pen, and added in a set of embellishments, because I just love these yummy Glitz Giant Rhinestones...
Thanks for allowing me to share with you...now I have to go scrub some floors and do some laundry, to make up for all of my time spent scrapping this week
Thursday, March 21, 2013
True Beauty
Today's project was a labor of love, a layout that I created for my oldest daughter. I am using a few current challenges that I wanted to play along with, and my "Hearts And Flowers" kit from February. I followed along with the sketch for this month from Artful Delight:
And played along with Tim Holtz's Tattered Florals challenge:
Supplies used: Basic Grey, Doodlebug, Graphic 45, DCWV,and My Mind's Eye patterned paper, bling by ZVA and Want 2 Scrap, Basic Grey letter stickers and Butterfly sticker, Tim Holtz Tattered Florals die, Tumbled Glass and Tattered Rose Distress Ink and Ranger ink blending tool and pads, MME brad, and Mr. Huey's mist.
And played along with Tim Holtz's Tattered Florals challenge:
To be honest, I was a little intimidated by this contest-I have so many great ideas for projects swirling around in my brain, and the projects that have already been submitted are AH-MAZING! But, scrapbooking is what I love and do the most craft-wise, and the time is drawing down to enter. So, I cut some flowers out of paper scraps with this die (I am happy to report it worked quite well in my Cuttlebug with 2 "B" plates), and inked them up with Tattered Rose and Tumbled Glass Distress Inks, and scrunched and shaped them with my fingers.
I am also entering this layout in this week's Simon Says Stamp Challenge: Easter/Spring, since the photo was taken in the spring, and nothing says "spring" to me more than flowers!
Here is what my finished layout looks like:
Supplies used: Basic Grey, Doodlebug, Graphic 45, DCWV,and My Mind's Eye patterned paper, bling by ZVA and Want 2 Scrap, Basic Grey letter stickers and Butterfly sticker, Tim Holtz Tattered Florals die, Tumbled Glass and Tattered Rose Distress Ink and Ranger ink blending tool and pads, MME brad, and Mr. Huey's mist.
Friday, February 1, 2013
Love, Elsie Blog Focus:Day 5 (Friday Wrap-Up)
Good morning! I can hardly believe that this week of stash busting and focusing on an older product has already come to a close! I got several pages finished this week, although not quite as many as I had originally planned...I am still pretty proud of the dent I am making in my stash! Today, I am sharing an example of something that I do with many of my older papers-Layering it in!
and a handful of pictures from the twins' first haircut! I had a lot of pictures (enough for a double page spread), and only one sheet of the embossed pink cardstock, so I knew that cutting it up and layering would be the best way to "stretch" the cardstock across two pages.
I ended up with this DPS:
A look at each page, individually;
Left side:
Right side:
And...that's a wrap on this series for me! If you would like more inspiration for using up your Love, Elsie papers and embellishments, please check out:
You have a couple more days to follow my blog and leave comments on my posts for this week for a chance to win the kit filled with Love, Elsie goodies. Tomorrow, I will be at elementary school basketball tournament games all day-all 3 of my younger kids are in the semi-finals. If they win their first games, they will play in the finals (also tomorrow)...Cross your fingers for them!
I had this lovely sheet of embossed pink cardstock from Love, Elsie (the Roxie collection, I believe). It was so fun and girly, I was reminded of this kit that I put together with my stash a few months ago, "Sassy Fashionista":
I ended up with this DPS:
A look at each page, individually;
Left side:
Right side:
And...that's a wrap on this series for me! If you would like more inspiration for using up your Love, Elsie papers and embellishments, please check out:
- Glitter Girl Adventure#15: Old And New To The Rescue
- or, you can check out my Love, Elsie board on Pinterest-if I stumble across any new Love, Elsie inspiration, I will be sure to pin it!
You have a couple more days to follow my blog and leave comments on my posts for this week for a chance to win the kit filled with Love, Elsie goodies. Tomorrow, I will be at elementary school basketball tournament games all day-all 3 of my younger kids are in the semi-finals. If they win their first games, they will play in the finals (also tomorrow)...Cross your fingers for them!
Thursday, January 24, 2013
Thursday Tips and Tricks
Hi, everyone! Happy Thursday!
I have a scrapbooking tip for you today! I know that most of you have probably heard the trick of lining your letter stickers up at the top of a ruler, right? Well, I rarely scrap with a ruler-perfectionism takes some of the fun out of scrapping for me. So, I compromise! Any straight edge will do for lining up those letter stickers-even the top of the sheet that they come on!
Like this:
I am thinking of making Tips and Tricks Thursday a regular feature on my blog...but I want to know what you all think! Drop me a line-let me know what you are interested in, and if you have any questions, I just might be able to answer them (in my less than perfect way, of course!)
Here is a look at the layout that these letter stickers went onto:
About this layout:
This layout was very much inspired by Shimelle. I started by trying to follow last week's Glitter Girl prompt to choose colors for the layout without drawing on the photo's colors- choosing school/reading themed papers and scraps rather than trying to match my childrens' non-matching outfits. As I was putting my page together, I was watching this week's Glitter Girl episode about journaling, and was inspired to tell the rather funny story behind my childrens' cheeseball grins in both the journaling and title. I am also drawing on some inspiration for the page design and theme from Shimelle's Scrapbook Remix class.
Supplies used: kraft cardstock background, papers and scraps from Crate Paper's Storyteller line (so glad I got that paper pad-I know I will be using it a lot!), scraps from Making Memories, Creative Imaginations, Graphic 45, and Lily Bee, the orange butterfly is a digi element from Jenni Bowlin's line at Jessica Sprague, and I printed it on an inkjet transparency and fussy cut around the edges, letter stickers are American Crafts Thickers and Jenni Bowlin, and I was able to use some digital elements I printed for a previous Counterfeit kit from Echo Park's Everyday Eclectic line, washi tape from Target's Up&Up line, along with some o-o-old embellies- Bazzill button flowers and Making Memories metal signs (the word "learn") and the little green house sticker.
What do you think? Don't forget to let me know if there is something you want me to feature on Thursday's Tips and Tricks segment!
I have a scrapbooking tip for you today! I know that most of you have probably heard the trick of lining your letter stickers up at the top of a ruler, right? Well, I rarely scrap with a ruler-perfectionism takes some of the fun out of scrapping for me. So, I compromise! Any straight edge will do for lining up those letter stickers-even the top of the sheet that they come on!
Like this:
I am thinking of making Tips and Tricks Thursday a regular feature on my blog...but I want to know what you all think! Drop me a line-let me know what you are interested in, and if you have any questions, I just might be able to answer them (in my less than perfect way, of course!)
Here is a look at the layout that these letter stickers went onto:
A closer look at the layering:
This layout was very much inspired by Shimelle. I started by trying to follow last week's Glitter Girl prompt to choose colors for the layout without drawing on the photo's colors- choosing school/reading themed papers and scraps rather than trying to match my childrens' non-matching outfits. As I was putting my page together, I was watching this week's Glitter Girl episode about journaling, and was inspired to tell the rather funny story behind my childrens' cheeseball grins in both the journaling and title. I am also drawing on some inspiration for the page design and theme from Shimelle's Scrapbook Remix class.
Supplies used: kraft cardstock background, papers and scraps from Crate Paper's Storyteller line (so glad I got that paper pad-I know I will be using it a lot!), scraps from Making Memories, Creative Imaginations, Graphic 45, and Lily Bee, the orange butterfly is a digi element from Jenni Bowlin's line at Jessica Sprague, and I printed it on an inkjet transparency and fussy cut around the edges, letter stickers are American Crafts Thickers and Jenni Bowlin, and I was able to use some digital elements I printed for a previous Counterfeit kit from Echo Park's Everyday Eclectic line, washi tape from Target's Up&Up line, along with some o-o-old embellies- Bazzill button flowers and Making Memories metal signs (the word "learn") and the little green house sticker.
What do you think? Don't forget to let me know if there is something you want me to feature on Thursday's Tips and Tricks segment!
Monday, October 15, 2012
CKCB Challenge #1
For our first challenge over at the Counterfeit Kit Challenge Blog this month, we were told:
My card, using a free digistamp from Paper Smooches:
Supplies used:
I printed the doily paper from my Everyday Eclectic digital kit on a transparency and stitched it to a white cardstock base, for the triangles on the left side of the card, I punched squares from scraps of hot pink and aqua cs, and cut them in half, added a double bow made from some sheer pink ribbon from Offray , a Paper Smooches digistamp that I printed on white cs and colored with my Copics, then die cut with my Cuttlebug and the scalloped circle Spellbinders die, mounted on a hot pink scalloped circle.
I am also sharing another card that I made from my October CKCB kit. I made this card for a challenge over at the Ellen Hutson Classroom blog, but since my internet was down, am too late to enter in the drawing. I used this sketch:
Supplies used: Everyday Eclectic digital paper, light aqua cs scrap, printed Everyday Eclectic digital border strip (the green, printed on sticker paper). Colorbok white glitter chipboard, October Afternoon rub-on, green glitter brads, orange washi tape from Target, Martha Stewart aqua baker's twine, and Tim Holtz Distress stain (on the outer glittered frame). Happy Birthday was stamped over the rub-on rose with Staz-On.
Quilt Challenge: Let quilts inspire your next project! Warm, cozy and every pattern/color you can think of! Have fun with this one!
When I saw the current "Designer Drafts" sketch challenge over at the Paper Smooches Sparks challenge blog, it reminded me of quilting, so I decided to combine the two.
The sketch:
My card, using a free digistamp from Paper Smooches:
Supplies used:
I printed the doily paper from my Everyday Eclectic digital kit on a transparency and stitched it to a white cardstock base, for the triangles on the left side of the card, I punched squares from scraps of hot pink and aqua cs, and cut them in half, added a double bow made from some sheer pink ribbon from Offray , a Paper Smooches digistamp that I printed on white cs and colored with my Copics, then die cut with my Cuttlebug and the scalloped circle Spellbinders die, mounted on a hot pink scalloped circle.
I am also sharing another card that I made from my October CKCB kit. I made this card for a challenge over at the Ellen Hutson Classroom blog, but since my internet was down, am too late to enter in the drawing. I used this sketch:
And I made this card:
Supplies used: Everyday Eclectic digital paper, light aqua cs scrap, printed Everyday Eclectic digital border strip (the green, printed on sticker paper). Colorbok white glitter chipboard, October Afternoon rub-on, green glitter brads, orange washi tape from Target, Martha Stewart aqua baker's twine, and Tim Holtz Distress stain (on the outer glittered frame). Happy Birthday was stamped over the rub-on rose with Staz-On.
Subscribe to:
Posts (Atom)