Showing posts with label scrapbooking. Show all posts

Friday, January 27, 2017

Continuing on with Design Decisions, Day 2 (Still Prompt One)

Today I am sharing another page that I made that was inspired by prompt one from Design Decisions, and  using my January kit:

Here's the base page:


(Yes, I am starting on my Washington DC trip! Yay me!) Almost everything was from the kit, with the exception of the chipboard book stack sticker, the "Create" sticker, and the letter stickers-which all came from my bag of partially used sticker sheets. I felt that the protractor paper was well suited to Thomas Jefferson, as well as the Create and book stickers. Here is the page after I did some journaling about the statue:
I have a lot of pictures, so I went ahead and added a pocket page, and journaled just a bit more:
 Front:
Back:

 And this is how it looks together in my album:


I did write down a lot of info about the making of the memorial itself, because they are details that were most likely told to us as we were touring the statue, but we learned so much on the trip, and there was so much information to absorb, that I will forget details if I don't write them down. And the trip and learning experience was so incredible that I don't want to forget the the things we learned. And maybe I will even learn more, as I am looking up these facts. So, I anticipate this trip album to be quite different from my other scrapbooks, in that I will be mixing historical facts and information about the sites we visited, along with stories of things that happened or moments that we experienced along the way. I think it will suit the trip itself quite nicely, as it was a lot of learning, overwhelming awe at seeing these places firsthand, and fun time with the kids and their friends along the way.

Tuesday, January 24, 2017

Getting Started With Design Decisions (Prompt 1)

Good Morning! I am back, and kicking off my new series with my first page from Design Decisions. I made my first page for my Disney album from my most recent trip, about one of my favorite rides, Haunted Mansion, and used papers and stamps from my November Counterfeit kit:
And here is my layout:


I printed the song from the ride using the Project Life app (love it when I want to print my journaling- opening a word processing program on my desktop to journal while I am making a page just doesn't work with my process, but this couldn't be easier for me!). I stamped the word Haunted, the skull/book/candelabra image, and the photo corners on white cardstock, then inked them with Old Paper Distress Ink, added lots of little scraps, washi strips, gemstone stars, flair, punched Mickey, fussy cut frames, and one more stamped sentiment (it's in white and a bit hard to see in the photo, but it's in the cluster by the title).

Here's a closer look at the clusters:


If you are just now joining me, I am challenging myself to use up my stash of kits over the next month or two-you can read the details on my blog post HERE. Thanks for joining me today, I will be back soon to share another page inspired by the class!

Thursday, January 12, 2017

Counterfeit Kit Challenge #2: Zentangles

Now, I will have to be honest. When I saw that this was my challenge, I groaned a bit. I don't Zentangle, and the thought of it sort of stresses me out. I thought and thought as to how I would make this challenge work for me, and I came up with a few different solutions. First I thought, well, I will print out a zentangle that someone else has created and then add it to a page. But then I couldn't come up with any ideas of anything that I wanted to scrap in this style. I could have used some doodle-y papers, like Love, Elsie (yes, I still have some) or some Bella Blvd. But, honestly, I didn't think of that until just now. My next thought was to save a Zentangle jpg and use it as a photo in a Project Life app page  (that is the scrapping style I am really focusing on right now, since I am trying to finish up my Project Life from last year-and I almost have it finished; only four weeks in August left to do). But then I really wanted a camera zentangle, and I couldn't find it, so, back to the Project Life App I went.

I saw a sketchy camera card in Maggie Holmes' Open Book collection, and the decision was made. "Good Enough!" And, so this is how I went from the zentangle inspiration to my page:

Which, I hope is a lesson in making inspiration work for you. As a side note, would you be interested in seeing more of the pages I make in the Project Life App? As I said earlier, I have most of 2016 scrapped this way, and I am really liking it so far. For my 2016 pages, I am printing them in 12x12 size and mixing them into my regular family album. For 2017, my plan is to complete them all and upload them for an 8x8 or 10x10 book. If there is interest, I would share some of them here, and talk about my process. I am definitely still learning, so I could share what I learn as I learn it, as well.

Sunday, March 6, 2016

"Marching" into March...

Happy March! There's nothing like a good scrapbooking crop and challenges to get my creative juices flowing, and this weekend, Shimelle is hosting one over at her blog:

It was just the boost I needed to get started on my March Counterfeit kit! The first challenge I took was the older photos/monochromatic challenge. I used all the yellows in my March kit, plus several neutrals, such as gray, black, and white. (ps-I love yellow and gray together! Reminds me of sunshine breaking through the clouds!)  Here is my layout:

I layered up a bunch of the journaling cards, washi, a frame, a couple of diecuts from my scraps bin, and a few cameras cut from the Amy Tangerine camera paper from my kit, flipped the green chipboard stars over, and inked them with charcoal American Crafts ink (that's actually why you notice a couple of smudges on my page, I tried to put them down before they were fully dry-oops!). I also glittered a wood veneer camera from my kit, and stamped a few of the stamps with the AC charcoal, as well. I love it, smudges and all, because it records a moment in my life that I actually haven't documented yet-my high school graduation. And it does it in a rather unexpected way, by telling what I thought my life was going to be like at that time, and how it is much richer and better now than I could have dreamed. Bonus:I got a great start on my March stash kit! We'd love to have you join us over at the Counterfeit Kit challenge blog!

Wednesday, November 25, 2015

A Little Scrappy Sharing...

I have lots of cleaning and cooking to do today, but before I get started, I have a few scrapbook pages to share with you...
As  I was going through and putting away some layouts, I decided to share a few that I finished up recently-they had been laying around waiting for finishing touches.

This page is made up from my March 2015 Welcome Sunshine kit:

The stamped woodgrain was my "Forgery on the Fourth" for that month.
I love the little cupcake sequin shaker from Crate Paper!

That kit really seemed to suit the photos from Evan's Harry Potter birthday party, because I scrapped another page from that party with the same kit:

That party was one of my favorites that I have done for the kids! If you want to see more of the party, you can click here:
http://scrappinmargie.blogspot.com/2011/10/harry-potter-birthday-party.html.

Anyway, thanks for stopping by my blog today for a few minutes- I am off to do my cooking/cleaning whirlwind before family arrives!

Friday, November 20, 2015

CKCB Design Team Activity:Gratitude Printables

Welcome everyone! It's been a little while since we have had a design team activity that we all participated in, so when Lisa had the idea for a "Gratitude challenge", I was absolutely on board! The challenge: use one of these awesome free printables from Allison Kimball:
This was a fun challenge for me, and it finally gave me a reason to scrap these photos from 2008:
These photos were so representative of that time for us- and I am so thankful for them! I am thankful not only for the things that I wrote about on the journaling card, but also for the time that I was blessed with to be able to spend the time with my children, at their field trips, and getting to experience so many of these moments with them. I treasure all of the friendships that developed from these times as well!

Here is the blog list to see what the rest of the DT did with the free printables:
Counterfeit Kit Challenge blog   http://www.counterfeitkitchallenge.blogspot.com

We would love to have you use the printables to play along! They're awesome, free, and a great reminder to be grateful for the little things! 

Tuesday, September 29, 2015

Inspired By Wrapping Paper

Remember this fabulous wrapping paper that was inspiring me?

I decided to take this challenge from CKCB:


Challenge 2: Gift Wrap Challenge:  Find some cool gift wrap and use it to inspire you (perhaps the theme or for your journaling or the patterns)

I combined the challenge with some inspiration gathered in Shimelle's Inspired By Class (specifically, Stephanie Bryan's page), and came up with this layout:
It's a little hard to tell from this photo, but the polka dot paper on this layout is white with gold polka dots from Teresa Collins. I used my "way back machine" to dig a photo out of the archives-and actually scrapped one of my senior photos.

Wednesday, June 24, 2015

June CKCB Member Blog Hop

Hi, and welcome to the June member's blog hop for the Counterfeit Kit Challenge blog!
I hope you have enjoyed your way through it, and welcome to my blog. Since I am the last blog on the hop, if you are coming to me first, you will definitely want to work your way through the rest of the blogs to see what everyone is making with their kits.As a quick refresher, this is the kit of supplies that I started with from my stash:

 I made several pages with my kit this month, some of which I have already shared, and some of which I will share later. I actually got a nice stack of older photos scrapped, which makes me happy!  First, I have the page that I made for the "transportation challenge":

Challenge #2:  Transportation Challenge:  Have something transportation related on your project.
(and yes, I realize the riding mower photos are a bit of a stretch as far as that goes):

Here is a peek at several more pages that I have made with this kit:

This page was made with papers from the kit-I flipped the teal and black patterned paper on the bottom row for my background sheet here:

And this page (another where I used the opposite side of the paper that I showed in my kit):
(my favorite part of this page is the sequins! Hands down.)

The background sheet for this page is the purple distressed paper's other side:

I used these papers as shown-I thought the constellation paper would be the perfect match for a page about bedtime stories:

And the background of this page is the B-side of the green and cream diamond patterned paper:
So, a lot of B-sides used, some older, not technically great photos used, some great stories and moments recorded,  and a great deal of the kit used up as well. I even have a few more to share, but figured that I need to stop somewhere, so as not to overwhelm you with pages and photos. But I will continue sharing for sure!

If you haven't made the rounds just yet, have a look around at what the other members' challenge projects look like, and what they have been doing with their kits. You are sure to be inspired!

CKCB   http://www.counterfeitkitchallenge.blogspot.com

Monday, June 22, 2015

Magic Monday...Arghh! No Pirates

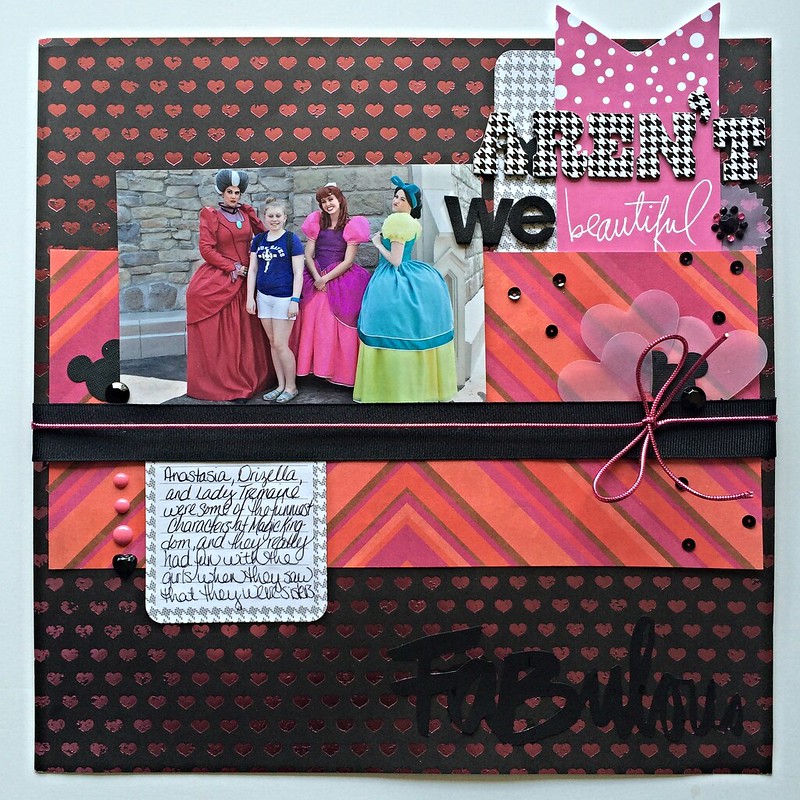
Good morning! Welcome to a new segment on my blog that I plan to make a regularly recurring segment, Magic Mondays. I intend to start sharing my Disney related scrapbook pages (and any other Disney DIY, news, etc, on Mondays. Mainly  as a way to motivate myself to get those Disney layouts scrapped, as we are planning another trip in 2016! Yay! Today's layout is made using my Counterfeit Kit for June , plus a few leftover bits from previous kits, and an ancient pirate themed sticker sheet.

Here's a look at my layout for today:

We had such fun meeting Tinkerbell-she was one of our favorite characters for sure! Her interaction with everyone was so funny and unique. When Natalie came up to meet her, she tried to stave her off with a giant crayon, because she "must be a pirate, since she had a tattoo". We all laughed and laughed!

Saturday, June 20, 2015

Scrapbook Stamping Saturday...Fun with Ombre ink!

I have had this fantastic new ombre ink


for a few weeks now, and I thought it would be just the right motivation to start my Saturday Scrapbook Stamping back up with!
 I also had some pretty scraps from a previous counterfeit kit, some fun border Stickers from my May add-on kit, Buttons and Bows, and this is how it all came together for me:

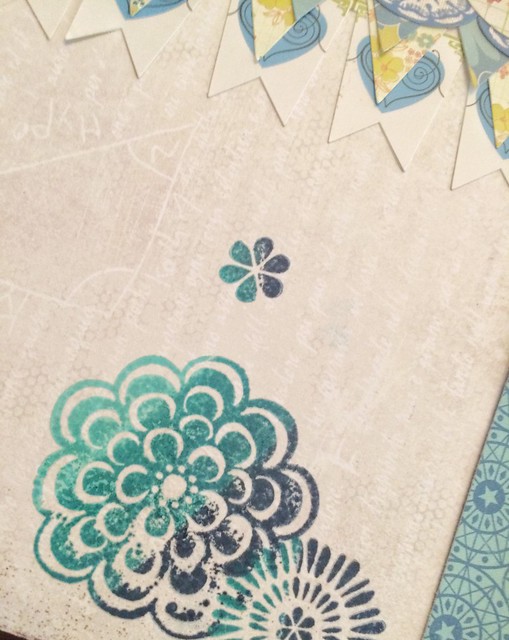
The ombre inks worked beautifully with some large flower stamps for layering, and just added the perfect touch of pizzazz to the layout. I layered several of the border stickers in the center of the page, over the join of the papers.
The stamping:

Untitled
All Layered Up:

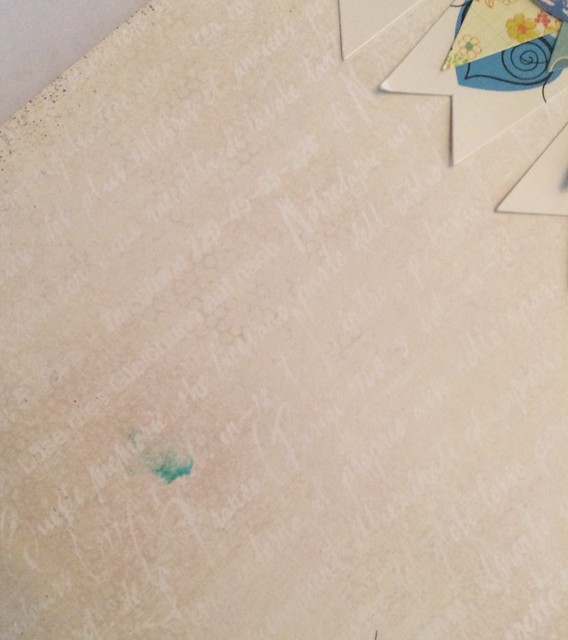
I got a little bit of ink on my finger while stamping, which I promptly smudged on my layout:


Untitled

Which is why I decided to stamp the three small butterflies on the upper left side! What do you think? Good enough for a cover up?

Saturday, May 9, 2015

Scrapbook Saturday...What I made for iNSD

What did you all do for iNSD last week? Did you play along with some challenges? Enter some giveaways? Blog hop? I did a little bit of all of it, as my husband and son were occupied with all of the sporting events that were on television. I played along with the Hip Kit Club Crop on Facebook, and got a few pages made, using my Counterfeit kits from April and May. Here's a look at my pages:
Here are a couple made from my April kit:
Untitled


And one from my May kits:


Next Saturday, I will be back to regularly scheduled "Scrapbook Stamping Saturdays". But I had fun with iNSD, and I hope you did too!

Saturday, April 25, 2015

Saturday Scrapbook Stamping: Inspired by Wilna/Stamping With Mist

I am still feeling very inspired by Wilna Furstenberg as I prepare for today's edition of Saturday Scrapbook Stamping. This page was inspired by a layout that she did for her Art and Design workshop at the old Big Picture classes. My page is a little different from Wilna's, but I did want to share what inspired me to get started and go in this direction. I am also using some of the cut files that she included in the class downloads (the die cut title and light bulbs).

This will be an adventure, as I have never stamped with mist before. Won't you come and learn with me?

I started by spraying mist from my April kit into a styro plate:
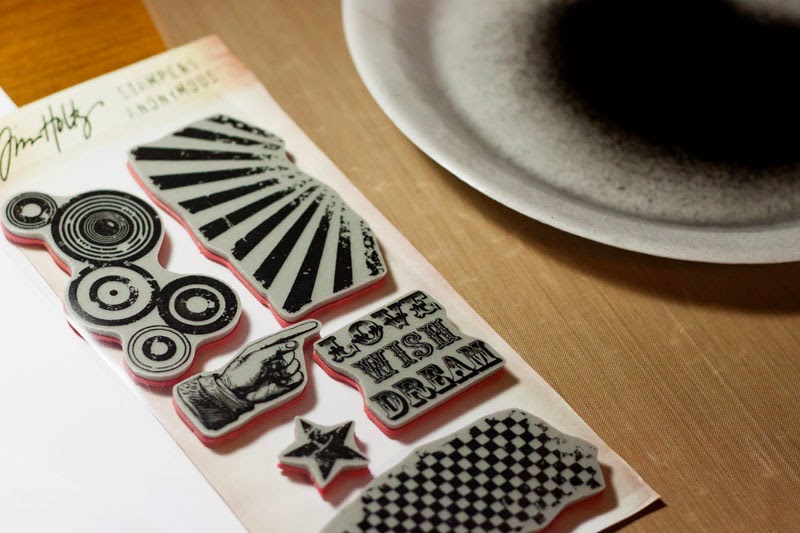
 I then selected some stamps-Tim's stamp set should give just the grungy look I want:


And inked it up. As you can see, the mist pooled quite heavily in some areas:

So I stamped a few times before inking again, and repeated across the center of the page:

I liked the look at this point, but felt like it needed a bit more. So, I dripped the remainder of the mist onto the page:

And this is how it looked when I was finished:

I still wanted a bit more variation, so I gave it a quick shot of mist from about 12 inches above for a fine mist, and then took the nozzle out of the bottle to make few more small drips and splatters with the straw:
 *WARNING! Spraying from high above it did cause the mist to over spray my craft mat a little bit!

I liked it at this point, so I let it dry while I did my die cutting, and then mounted it to a sheet of black and white cardstock from my kit:

Now I decided to have a bit of a play with my homemade texture paste:

I wanted it to be yellow, so I dumped some homemade yellow mist (I thought I dumped too much, but it turned out about right):

I mixed it up and added a spritz of Gold Lame as well:

Then I put the light bulbs on the page where I wanted them to be:

And picked them up one cluster at a time, and added a thick layer of the colored paste:

And then set the cut files on top of the paste. After they dried a bit, I pressed them down into the paste a little bit more:

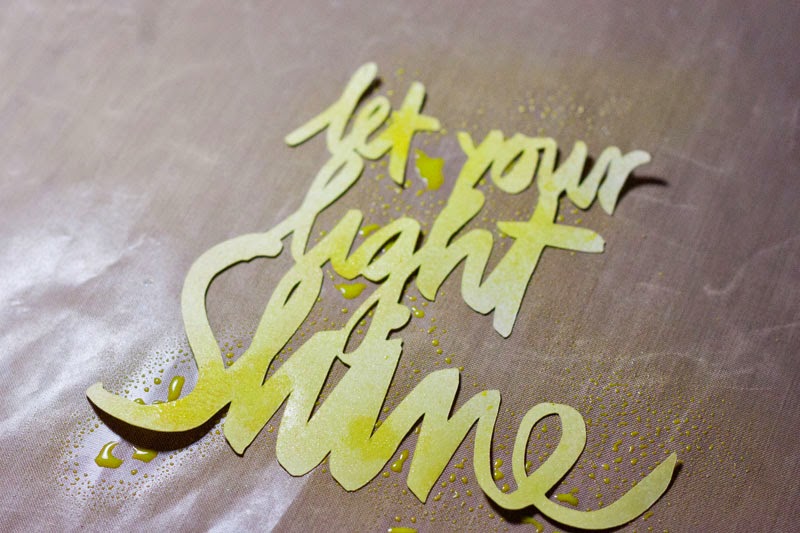
I die cut the title out of a light yellow cardstock scrap, but it was too light, so I decided to mist it with my homemade mist:

There, I like it better already!

I added my photo (after rounding the corners and doing an offset mat on two PL cards from my kit), some scraps, some of the yellow vellum hearts, and some of the black sequins, and a few dabs of Paper Glaze where the light bulbs hadn't adhered completely, adhered the title, and came up with a fun, artsy page, very much inspired by Wilna, that used quite a few bits from my kit, and stamping in a different sort of way!


I hope I inspired you to break out your stamps today!