I am still feeling very inspired by Wilna Furstenberg as I prepare for today's edition of Saturday Scrapbook Stamping. This page was inspired by a layout that she did for her Art and Design workshop at the old Big Picture classes. My page is a little different from Wilna's, but I did want to share what inspired me to get started and go in this direction. I am also using some of the cut files that she included in the class downloads (the die cut title and light bulbs).
This will be an adventure, as I have never stamped with mist before. Won't you come and learn with me?
I started by spraying mist from my April kit into a styro plate:
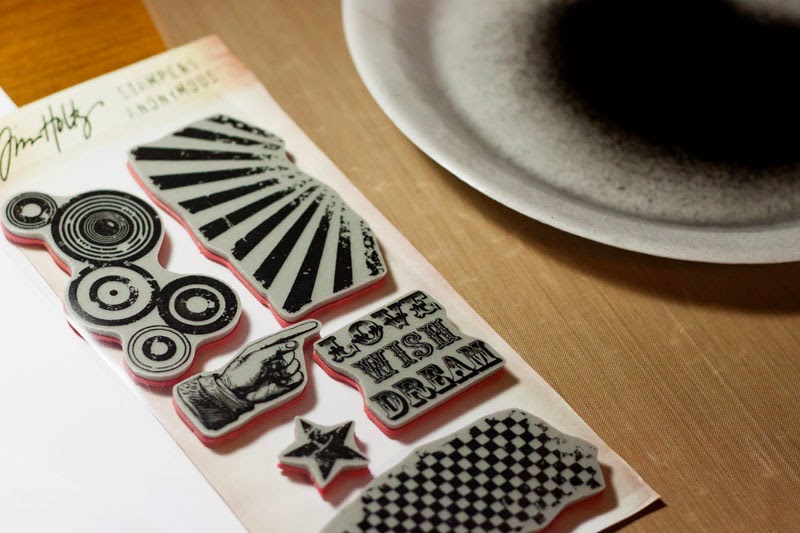
I then selected some stamps-Tim's stamp set should give just the grungy look I want:
And inked it up. As you can see, the mist pooled quite heavily in some areas:
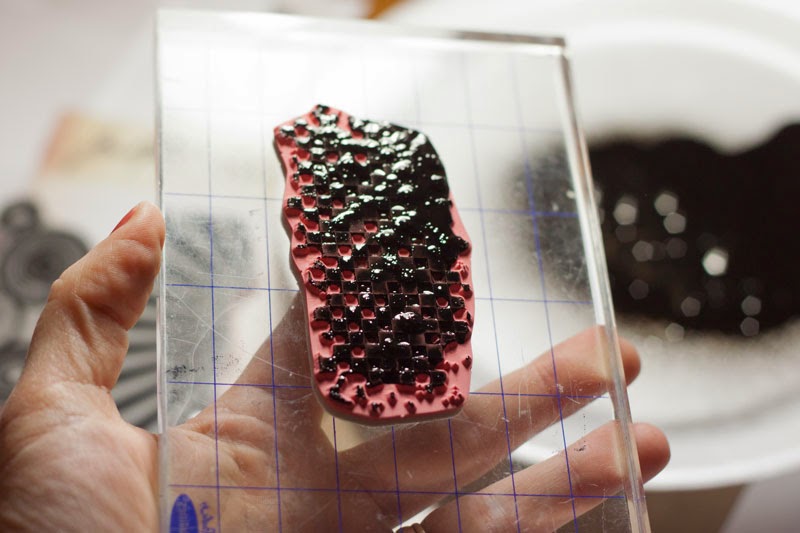
So I stamped a few times before inking again, and repeated across the center of the page:
I liked the look at this point, but felt like it needed a bit more. So, I dripped the remainder of the mist onto the page:
And this is how it looked when I was finished:
I still wanted a bit more variation, so I gave it a quick shot of mist from about 12 inches above for a fine mist, and then took the nozzle out of the bottle to make few more small drips and splatters with the straw:
*WARNING! Spraying from high above it did cause the mist to over spray my craft mat a little bit!
I liked it at this point, so I let it dry while I did my die cutting, and then mounted it to a sheet of black and white cardstock from my kit:
Now I decided to have a bit of a play with my homemade texture paste:
I wanted it to be yellow, so I dumped some homemade yellow mist (I thought I dumped too much, but it turned out about right):
I mixed it up and added a spritz of Gold Lame as well:
Then I put the light bulbs on the page where I wanted them to be:
And picked them up one cluster at a time, and added a thick layer of the colored paste:
And then set the cut files on top of the paste. After they dried a bit, I pressed them down into the paste a little bit more:
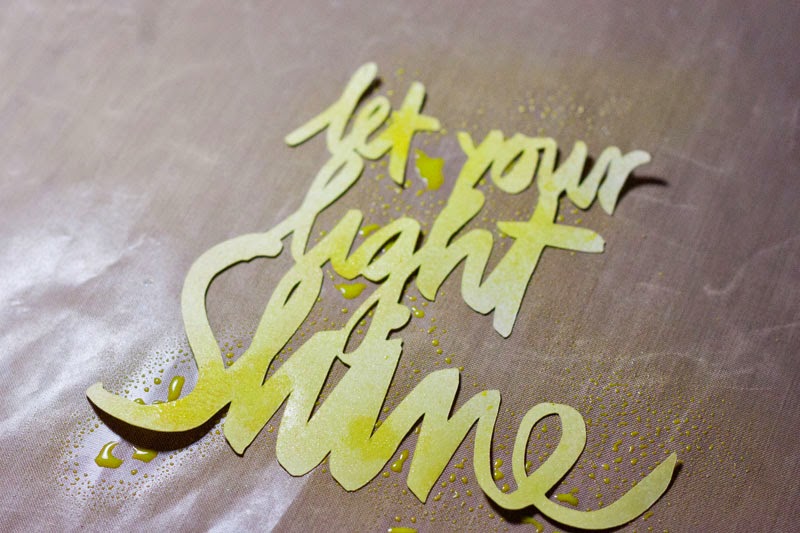
I die cut the title out of a light yellow cardstock scrap, but it was too light, so I decided to mist it with my homemade mist:
There, I like it better already!
I added my photo (after rounding the corners and doing an offset mat on two PL cards from my kit), some scraps, some of the yellow vellum hearts, and some of the black sequins, and a few dabs of Paper Glaze where the light bulbs hadn't adhered completely, adhered the title, and came up with a fun, artsy page, very much inspired by Wilna, that used quite a few bits from my kit, and stamping in a different sort of way!
I hope I inspired you to break out your stamps today!
Showing posts with label Heidi Swapp. Show all posts
Saturday, April 25, 2015
Tuesday, November 12, 2013
The "C" Word...Getting a Jump on It
"Christmas"...I know, I know...it's not even Thanksgiving yet-but, here in blog land, the Christmas season is already in full swing! I am trying to get an early start, myself, as I have a very busy couple of months ahead. So, I am diving in with my Journal Your Christmas album preparations. So far I have a kit, and I have made my album covers, so I am way ahead of last year!
My album covers:
I made them 9 inches x 9 inches (I plan to make my pages 8x8, and I wanted the covers bigger), cut from chipboard sheets leftover from product packaging, and rounded the corners. The paper that I covered the chipboard with is from the Heidi Swapp Believe collection, and I added droplets of gold spray paint and Color Shine mist. The embellishment clusters are made up from a doily, sequins from my stash, pearls and gems from my stash and some grungeboard letters and numbers that I spray painted gold. All kit and album items are from my stash, either won or purchased before I decided to freeze my spending.
Here is the kit I gathered up, "Twinkle Lights":
Filled with beautiful colors, and yummy hints of golden sparkle and silvery shimmer, my stash kit is made up of lovely warm reds and icy spearmint greens, cream based papers with a bit of the chalkboard trend for a fun twist. I am completely happy with this kit, and I don't think I will mind not having a purchased kit at all! I am a washi girl for sure, and my kit could also be called a "Washi Wonderland", because I have included bunches of it!
Here is a closer look at my pretty papers, since we all know that is my favorite part:
I have included selections from an older October Afternoon line, Very Merry, an older Martha Stewart line, Glitz's Finley collection, red embossed snowflakes from an older We R Memory Keepers line, a red chevron paper from Bella Blvd's Christmas Countdown, and several from Heidi Swapp's Believe line.
I have plans and ideas for handmade numbers, diecuts, and other embellishments, which I will share as I finish them. For now, I am happy with the head start that I have gotten on my Journal Your Christmas project!
My album covers:
I made them 9 inches x 9 inches (I plan to make my pages 8x8, and I wanted the covers bigger), cut from chipboard sheets leftover from product packaging, and rounded the corners. The paper that I covered the chipboard with is from the Heidi Swapp Believe collection, and I added droplets of gold spray paint and Color Shine mist. The embellishment clusters are made up from a doily, sequins from my stash, pearls and gems from my stash and some grungeboard letters and numbers that I spray painted gold. All kit and album items are from my stash, either won or purchased before I decided to freeze my spending.
Here is the kit I gathered up, "Twinkle Lights":
Filled with beautiful colors, and yummy hints of golden sparkle and silvery shimmer, my stash kit is made up of lovely warm reds and icy spearmint greens, cream based papers with a bit of the chalkboard trend for a fun twist. I am completely happy with this kit, and I don't think I will mind not having a purchased kit at all! I am a washi girl for sure, and my kit could also be called a "Washi Wonderland", because I have included bunches of it!
Here is a closer look at my pretty papers, since we all know that is my favorite part:
I have included selections from an older October Afternoon line, Very Merry, an older Martha Stewart line, Glitz's Finley collection, red embossed snowflakes from an older We R Memory Keepers line, a red chevron paper from Bella Blvd's Christmas Countdown, and several from Heidi Swapp's Believe line.
I have plans and ideas for handmade numbers, diecuts, and other embellishments, which I will share as I finish them. For now, I am happy with the head start that I have gotten on my Journal Your Christmas project!
Wednesday, August 7, 2013
Scrapbooking with 3 3x4 cards ...Or Not! (No Spend Challenge 4/50)
Well, I read the challenge on Shimelle's blog, went about and did some chores-and then I did it, but I did it the wrong way. Go figure! I promptly went, got 3 4x6 cards and put them on the page, and didn't realize I had done the challenge wrong until I went to blog about it! Oh well-happy accidents, right? This is my page:
A closer look at some of the details:
I made this page for my son and his best friend, Trevor-photo was taken on his 5th grade graduation.
This was another page filled with yumminess from the last CHA: Glitz Color Me Happy (LOVE the Giant rhinestones), MME About a Boy, Jenni Bowlin whitewashed woodgrain washi, Jillibean Soup Wise Words, and all splattered with some yummy Heidi Swapp Sweet Cherry Color Shine.
A closer look at some of the details:
I made this page for my son and his best friend, Trevor-photo was taken on his 5th grade graduation.
This was another page filled with yumminess from the last CHA: Glitz Color Me Happy (LOVE the Giant rhinestones), MME About a Boy, Jenni Bowlin whitewashed woodgrain washi, Jillibean Soup Wise Words, and all splattered with some yummy Heidi Swapp Sweet Cherry Color Shine.
Wednesday, April 17, 2013
Another Day, Another Scrapbook Page...
This time, my layout was inspired by a sketch from the Scrappiest:
Again, I used my March kit (I am loving this kit so much! One of my favorites of all time!!):
I used some of my favorite paper from Dear Lizzy's Lucky charm collection, and other bits and pieces from the kit (the banners were perfect for using up some of my scraps!), an Elle's Studio journaling card, a piece of washi from the washi tape sheet from Maggie Holmes, a few of the Maggie Holmes cut out tags, a few little Jillibean Soup letter stickers, some of the chipboard pieces from the Dear Lizzy chipboard Thickers, and some Gold Lame and Primrose Color Shine from Heidi Swapp.
I backed the cut-out letters with some Lucky Charm striped paper:
I love the yummy Color Shine mist too! I need more colors!
I am linking this layout up to: Simon Says Stamp: Cityscapes or Travel, since the photo is from a trip my family took last year, Layout Love Linky, The Scrappiest, and the Counterfeit Kit Challenge blog
Now...off to see what I can do for this weeks' Glitter Girl prompt...it's right up my alley, since it involves kit-building/scrapping from the limitations of a kit! Ta-ta for now!
Again, I used my March kit (I am loving this kit so much! One of my favorites of all time!!):
I used some of my favorite paper from Dear Lizzy's Lucky charm collection, and other bits and pieces from the kit (the banners were perfect for using up some of my scraps!), an Elle's Studio journaling card, a piece of washi from the washi tape sheet from Maggie Holmes, a few of the Maggie Holmes cut out tags, a few little Jillibean Soup letter stickers, some of the chipboard pieces from the Dear Lizzy chipboard Thickers, and some Gold Lame and Primrose Color Shine from Heidi Swapp.
I backed the cut-out letters with some Lucky Charm striped paper:
I love the yummy Color Shine mist too! I need more colors!
I am linking this layout up to: Simon Says Stamp: Cityscapes or Travel, since the photo is from a trip my family took last year, Layout Love Linky, The Scrappiest, and the Counterfeit Kit Challenge blog
Now...off to see what I can do for this weeks' Glitter Girl prompt...it's right up my alley, since it involves kit-building/scrapping from the limitations of a kit! Ta-ta for now!
Tuesday, April 16, 2013
Another layout from my March kit...
Just a quick post to share the page that I made using Shimelle's Sketch 12 and my March kit:
Love the papers-Maggie Holmes, Pebbles, Amy Tangerine...and I added some of my new Heidi Swapp Color Shine mist, a Tim Holtz mask, some Want 2 Scrap pearls, a Basic Grey Canvas tag, pink chevron washi tape, a flocked Doodlebug brad, a heart from the Dear Lizzy Lucky Charm set fit in the fussy cut camera perfectly, and I put a coating of Glossy Accents over it to make a "lens".
Here is a closer look at the embellishments:
Thanks for looking-I always love to know what you think!
Tuesday, April 9, 2013
I have Issues...Paper Issues...
I have been following paper Issues for quite awhile now, and I wanted to play along with some of their fun challenges ! So, I pulled out my March kit and got to work on their two most recent ones: "InstaLove" , and "Up In The Clouds". Now, I may be the last person in the world that doesn't have an Iphone or Droid, so I don't have an Instagram account (soon, I hope). But, my brother does, so I pulled an adorable picture of my nephew from my brother's Instagram to make this layout:
The papers are Dear Lizzy 5th and Frolic, Dear Lizzy Lucky Charm, And The Maggie Holmes line for Crate Paper (a lot of which are available at the Paper Issues store-AND you can use the code ASHLEY75 to save 20%!). The ribbon and chipboard pieces are from Lucky Charm also, and, since the umbrella in the chipboard pack was a little too girly for my layout, I painted it with a lovely mint green, and I coated the chipboard raindrops with Glossy Accents to really give them a wet look. I sprinkled October Afternoon Sprinklers and Mr. Huey's mist across the layout on a diagonal, and added a few little drops of Glossy Accents across the layout to really carry out the rain effect-and I love how it came out! Isn't my nephew the cutest thing in this raincoat and boots?
Here is a closer look at the "rain":
I was also inspired by last week's "Up In The Clouds" theme. When I saw the challenge, I immediately thought of this gorgeous Maggie Holmes cloud paper:
Now, I am not normally a big fan of cloud paper, but this one is just so gorgeous that I can't get enough of it! I love the aperture/bokeh effect that is applied to it-so, so pretty!
Here is my layout:
I used a lot of Maggie Holmes paper, and a piece of the Dear Lizzy Lucky Charm yellow hearts paper. I loved that this black and cream chevron already had a misted look-I added a little more, because I had some new Primrose Heidi Swap Color Shine that I was dying to try, added some Thickers, Jillibean letter stickers, a doily that I die cut with a Papertrey Ink die from a scrap, some misted wood veneer butterflies, washi, Want 2 Scrap pink pearls, an Amy Tan camera stamped on a scrap of kraft, a chipboard star with a cut out center that I misted with Gold Lame Color Shine, and filled the center with gold Stickles. I added Glossy Accents for "lens" on the camera:
I used this fabulous sketch from Shimelle:
Thank you for stopping by today, I made some more layouts with my February and March kits, so I will be back to share more tomorrow!
The papers are Dear Lizzy 5th and Frolic, Dear Lizzy Lucky Charm, And The Maggie Holmes line for Crate Paper (a lot of which are available at the Paper Issues store-AND you can use the code ASHLEY75 to save 20%!). The ribbon and chipboard pieces are from Lucky Charm also, and, since the umbrella in the chipboard pack was a little too girly for my layout, I painted it with a lovely mint green, and I coated the chipboard raindrops with Glossy Accents to really give them a wet look. I sprinkled October Afternoon Sprinklers and Mr. Huey's mist across the layout on a diagonal, and added a few little drops of Glossy Accents across the layout to really carry out the rain effect-and I love how it came out! Isn't my nephew the cutest thing in this raincoat and boots?
Here is a closer look at the "rain":
I was also inspired by last week's "Up In The Clouds" theme. When I saw the challenge, I immediately thought of this gorgeous Maggie Holmes cloud paper:
Now, I am not normally a big fan of cloud paper, but this one is just so gorgeous that I can't get enough of it! I love the aperture/bokeh effect that is applied to it-so, so pretty!
Here is my layout:
I used a lot of Maggie Holmes paper, and a piece of the Dear Lizzy Lucky Charm yellow hearts paper. I loved that this black and cream chevron already had a misted look-I added a little more, because I had some new Primrose Heidi Swap Color Shine that I was dying to try, added some Thickers, Jillibean letter stickers, a doily that I die cut with a Papertrey Ink die from a scrap, some misted wood veneer butterflies, washi, Want 2 Scrap pink pearls, an Amy Tan camera stamped on a scrap of kraft, a chipboard star with a cut out center that I misted with Gold Lame Color Shine, and filled the center with gold Stickles. I added Glossy Accents for "lens" on the camera:
I used this fabulous sketch from Shimelle:
Thank you for stopping by today, I made some more layouts with my February and March kits, so I will be back to share more tomorrow!
Sunday, October 23, 2011
A Few Challenges and some Scrapbooking to Share
Sorry, I have been a bit of a bad blogger lately. I have spent some time creating, but not nearly enough time sharing. So, I thought it would be a good time to share some of the pages I have made with you.
First up is a page that I did for the CKCB blog's layering challenge. I used sketch #177 from Creative Scrappers. I also took the prompt to make a fall/Halloween page from Sketches 4 All, and this is what I came up with.
The page I made:
Swirly gray background paper was the backside of the Heidi Swapp, "The Lounge", and the green stripes were the backside of the Heidi Swapp "Groovin". I used a black glitter pumpkin border from the KI Memories Wicked border stickers, We R Memory Keepers Blackout felt border, a green ZVA bling flourish, an assortment of Primas from my kit, along with some of the Basic Grey Eerie brads, and a black and a few brass brads the chipboard letter stickers are American Crafts Thickers.
I am also sharing a page that I made with another sketch from Creative Scrappers.
The sketch I used, #175:
The page I made :
I still need to do some journaling, but I love the way it turned out so far!The supplies were all from my October Main kit: the back of the Echo Park Life Is Good "Bold Stripes", the polka dot and flowered paper is Crate Paper Emma's Shoppe "Dresses" (both sides), and used some border stickers and letter stickers from the Echo Park Life is Good Element and Alpha Stickers, pink satin homemade flower, some of my digital elements that I printed out on sticker paper for my kit: a Cosmo Cricker "Gluber" flower, and a yellow journaling spot from Echo Park's Digital collections, and pink Thickers that I used my pearl colored paint dabber on.
If you'll check back, I'll be sure to share the rest of my October pages through the next week, I promise ;-). Thanks for stopping by today!
Subscribe to:
Posts (Atom)